Monday, January 31, 2011

One World One Heart

Welcome to my blog! I am happy to be participating in my 4th One World One Heart blog event. You can read about this event and discover the other participants by clicking on the OWOH logo to the right.
Since my children have grown, so has my creativity. I love making cards, ATCs, scrapbooks and quilts. I have discovered mixed media and have fun experimenting, but my first love is still playing with paper. I love making backgrounds, and have a large stash on hand to use for projects when needed.
I made this soldered ceramic tile necklace, and it is my give away for the 2011 One World One Heart event:
close up of front of the tile:
close up of the back of the tile:
To win this necklace you must leave a comment on this post along with a link to your blog or your email address, so I can contact you if you are the winner. The winner will be chosen by a random drawing.
I will accept comments through Feb. 17th 2011 and will announce the winner on my blog the next day, Feb. 18th. If the winner does not respond to my email within 3 days, I will choose another winner.
I hope you have some time to look around my blog and I look forward to meeting you on your blog!
Note of 2/4/11: here's a link to an earlier post of how I made this necklace.
Note of 2/2311: the necklace has been sent to Needlewings, congratulations.

Thursday, January 27, 2011

Book Study - Fused Fibers

On NGS group we are continuing our study of Bernie Berlin's book "Artist Trading Card Workshop". This week, we are looking at the section "Fused Fibers". Bernie says to lay fusible webbing over your blank card. I used HeatnBond. Then lay an assortment of fibers over the fusible webbing.
Pile on the fibers as desired, and some bits of more fusible webbing, then randomly sprinkle embossing powders of your choice.
Lay a heat resistant craft sheet over the pile of fibers & embossing powder and apply heat with a hot iron, then turn the card over and use the iron to heat the back of the card. When the card has cooled, remove the craft sheet.
Trim fibers as desired. This is a fun technique. Lots of possibilities.
Trimmed my fused fiber card and layered on to black card stock. Added a gold fiber ribbon
, an image, and a metal tag which was colored with red alcohol ink and attached with black metal brads.

Friday, January 21, 2011

Book Review - No-Sew Fabric

On NGS group we're doing a book study of Bernie Berlin's book "Artist Trading Card Workshop", this week's section is "No-Sew Fabric". In the book, Bernie shows how to transfer an image to muslin with a piece of carbon paper and she colors the piece with fabric pastels. I don't have any of those supplies, so I decided to see what I could make with what I had on hand.
Cut out a piece of heavy muslin to ATC size and stamped on an image with Black Ancient Page ink.
Initially colored the muslin with Distress inks.
Covered the stamped image with a cut to shape post-it-not, and stamped some script with black Ancient Page ink.
Decided to color and darken the bottom of the muslin with brushed corduroy Distress ink reinker and a little bit of water, once it had spread enough, heat set with a heat tool to stop the ink from spreading further. Used a fabric marking pen along the edges of the stamped imaged. Used a Tim Holtz die to cut out small house shapes from a piece of painted acrylic background and colored two heart shape brads with red alcohol ink.
Used heat and bond to adhere muslin to some felt, then adhered card stock to the back to stiffen the piece. The put all the pieces together.
Don't be afraid to experiment with different materials.

Saturday, January 15, 2011

Faux Folio

I've signed up for the "F" part of the alphabet swap on Art Venturers. I made a Folio filled with samples of faux techniques for the swap. Decided to do a little faux for the covers as well.
Cut out grungeboard and lightly misted with water, then rubbed in brown Distress ink on both sides and the edges and let dry.
Ran the grungeboard through an embossing folder and rubbed mahogany Distress ink over the raised areas on both sides.
The side of the grungeboard I'm using for the outside covers, reminds me of tooled leather, sort of feels like thick leather also.
The side of the grungeboard I'm using for the inside of the covers reminds me of tapestry.
For the lettering, used grungeboard letters, colored them with mahogany distress ink, let dry, then coated them with gold acrylic paint. Ran through an embossing folder and rubbed some vintage photo Distress ink on the raised areas.
Here's the finished cover of my folio of faux techniques. The embellishments is a small faux dichroic glass piece.
Folio opened showing sheets of faux techniques. I've written out the instructions and adhered them to the backs of each page.
Back of the faux folio has and embellishment I made by using a flourish die to cut out a piece of the faux rusted metal paper.
Hope my swap partner enjoys it as much as I did making it.

Friday, January 14, 2011

F is for Faux Silk

I played with this technique a couple of years ago, and decided to play with it again.
Cut tissue paper about 1/2" larger than you want. Stamp image over the tissue paper (I started with a piece of left over light green tissue paper).
Gently wrinkle the tissue paper until it's covered with creases, be careful not to tear.
Gently spread the tissue paper over a piece of card stock that is covered with adhesive, and press down.
You can trim the edges and stop here or add a little shimmer.
I rubbed on some Moonlight Brilliance ink to soften my stamped images.
Finished faux silk:

F is for Faux Felt

This is another technique from Technique Junkies about a year ago. Choose any color card stock and run through a crimper, first in one direction, then turn 90 degrees and run through again.
Run same card stock through crimper along both diagonals. Continue turning the card stock about and run through the crimper, many, many times. This softens up the fibers inside the card stock. I probably ran my card stock through 20+ times.

The card stock will start to separate at the corners, gently pull the card stock apart, you'll end up with 2 sheets of faux felt from this one piece. Mine did not tear apart evenly, probably because it was a big piece. I think small pieces would work better.
One use of this faux paper that I've seen and liked are to cut out flower shapes to use as embellishments.

Book Study - Glass Like Resin

We are studying Bernie Berlin's book "Artist Trading Card Workshop" in the NGS group, this week it is the section "Glass-Like Resin". I will show you all the steps, but my experiments did not turn out.
To color the background, dry brush on a couple of colors of acrylic paint.
Cover the entire surface with clear embossing ink an sprinkle Embossing Enamel over the surface and heat set.
Repeat with inking the surface with clear embossing ink, covering with embossing enamel and heat setting.
While the embossing enamel is still warm, press an inked stamp onto the surface until it cools, about a minute.
The samples in Bernie's book are wonderful. As you can see, the enamel did not stick to my card base. I also tried with three layers of enamel, and all the layers of enamel came off the card base.
I would love to hear some tips and suggestions on how to make this technique work.

Thursday, January 13, 2011

Quilted Clutch Purses

I enjoy making this small quilted clutch purses, that I made these for a Facebook handmade pay if forward challenge. Hope the recipients enjoy them.

F is for Faux Washi Paper

This is another faux technique I've done before, but wanted to try with different ink.
Place tissue paper on plastic to protect your work surface. Mist the tissue with water. Drop on ink in colors of your choice. I decided to try Distress Ink re-inkers because the colors are nice and intense.
Spread the ink to cover the tissue, it's okay to blend the colors.
Drop on gold ink and spread over the surface as desired.
The colors in this technique or so intense you can get several papers from this sheet. Mist the paper again and lay another tissue over and press down to pick up the colors. Carefully lift up and set aside to dry. Continue misting and adding additional tissue paper as desired. Each sheet will get lighter.
Stamp over the paper with images of your choice. I used lightening black StazOn ink.

Fantasy ATC

For this swap, I wanted to create a background that would look like it was somewhere out in the universe. Made a glimmer spray out of bronze Perfect Pearls and some Mica Powders mixed in water in a fine spray bottle and sprayed over black paper. Added some larger drops of gold Shimmering Mists, by using the plastic tubing to drop on the mist.
Cut the background into smaller pieces and layered on to purple card stock. Added a fairy with a moon image and some metallic stars.
Title: Where Dreams Are Born

Wednesday, January 12, 2011

F is for Faux Velvet

One more faux technique from Technique Junkies. This one looks better in person, than in pictures. I made some adjustments.
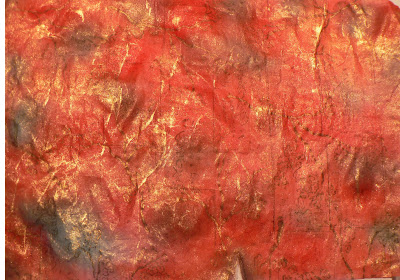
Place a baby wipe on plastic and spray with color washes of your choice and either use a spray with glimmer or spray on some perfect pearls mixed with water. I choose these intense reds and some left over orange I had made previously. Let dry (it takes a while)
Cut dyed dried baby wipe to size and adhere to card stock, then run through an embossing folder.
I wanted the embossing to stand out a bit more, so I cut another piece, adhered to card stock and on the side of the embossing folder that would push down, inked with red Distress ink and then ran through the embossing folder.
Since I choose a red, that wasn't darker than the red already in the baby wipe, the difference is subtle, but I do think it makes the embossing seem to stand out more.