Saturday, August 28, 2010

Book Study - Stencil Techniques

This week in the NGS group we are looking at stenciling techniques in Julia Andrus' book "Paper Transformed". Julia discusses stencils, positive stencils produce a negative image on paper and a negative stencil produces a positive image on the paper.
She shows how you can make your own stencils out of punched images. Here I made a large stencil cut out of a die.
Julia shows how you can make negative stencils (or a mask) I used the punched out pieces and added removable adhesive to the underside to keep them in place while adding ink.
Julia also demonstrates Overstenciling, where negative and positive images are stenciled together, making a bold & graphic statement. (Her example with leaf stencils in her book is stunning). In the photo below, I have added a positive stencil over my negative stencil:
Continued mixing the same positive and negative stenciled images with different colors of dye ink to create a background with depth:
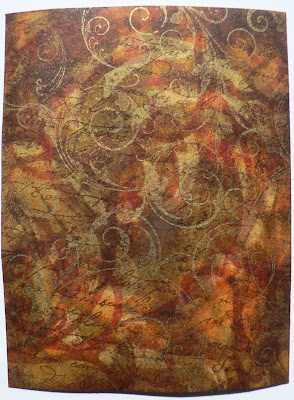
I finished my background with stamps. Stamping a similar flourish with gold Encore! ink. Stamping a french script with dark Distress ink, and using this same ink to color the edges of the paper:
I now have a rich background to use in a project:

Saturday, August 21, 2010

Book Review - Handles and Bent Hinges

This week on NGS group we are looking at the section "Handles and Bent Hinges" in Julia Andrus' book "Paper Transformed". Julia notes that this project must be completed at the time you start or the glue will dry before the piece can be manipulated.
In Julia's book, she suggests painting the pieces at the end to simulate the look of metal (similar to Hardware or Filigree sections). I wanted my bits to look like leather, so (using a Tim Holtz die cut) I cut the top layers for two pieces out of the Leather Paper that I made earlier. Also cut two pieces of plain brown card stock to be the bottom layers. Julia mentions that thinner layers will hold their shape better, and recommends only using 2 - 3 layers of die cuts for this project.
Adhere 2 or 3 matching layers of die cuts with white glue, and WHILE the glue is still wet, form the shape around a dowel or paint brush. I used a small hand weight, because my pieces are quite large. I folded back the sections I wanted to lay flat.
After the piece is completely dry, smooth the rough edges with sandpaper or a small file. Paint and age as desired. Because I started with the leather paper, I just colored the edges with Aged Mahogany Distress ink (the same ink I'd used in making this piece of Leather Paper).

These will be fun to use on a project.

Monday, August 16, 2010

Eclectic Embellished Envelope Book for Ephemera

I'm so happy, the alphabet swap is continuing on another one of my groups. This time: the letter "E". I was inspired by an elegant Envelope book from Margaret I received a year ago. It's one of my favorite swaps.
My style, however, is not elegant - more grungy, so my creation will look very different than the one I have & adore. Created an Envelope book for this swap with my eclectic collection of papers I have made. Some are from the classes I took at last year at the Midnight Art Ranch, some are paste paper I made many years ago and one is a recycled paper grocery bag, misted, crumpled and acrylic paints sponged on.
Choose eight papers to be the outside of the envelopes and cut down to size. For the papers that were one sided, I adhered another sheet of my home made papers to the inside.
For the covers, I used the Squishy Book pages I made last autumn. Stamped with black Stazon ink. Adhered the Hardware piece I made last week and added fibers, a stamped bronze charm and a large key:

To tie the eclectic papers together, sponged on white acrylic paint over sequin waste and stamped images with black Stazon ink. Envelope edges were sewn with black embroidery stitches. I love alliteration and got the "e" stuck in my head, so my envelope themes, became "e" inspired. Used an eclectic assortment of embellishments to enhance each envelope. Hope you enjoy the slide show.


Some notes:

Embellishments on Egyptian envelope are Faux Dichroic glass similar to this.

Embellishment on Elegant envelope is grungy quilled flower.

Embellishment on Enigma envelope is a Brocade Polymer Clay star .

Lower embellishment on End envelope is a piece I made out of watch parts and a rhinestone.

Added an eclectic assortment of ephemera into each envelope page. Hope my swap partner is enthralled with this creation!

Saturday, August 14, 2010

Medicine Bottle Challenge

At Stamp Club, we were given medicine bottles and challenged to re purpose them for an alternative prescription. My theme is laughter: the best medicine. I stamped a large label with the saying "Life is Better when it is Fun". And added a round label about Laughing. I coated the round label and the dots on the large label with Perfect Pearls.
I made a duplicate of the round label for the top of the cap:
Cut out and adhered a vintage Fairy image to the other side of the large label:
Stamped a quote by Barrie [When the first baby laughed for the first time, the broke into a thousand pieces and they all went skipping about, and that was the beginning of fairies.] on the other side of the bottle with Azure StazOn ink and added Prisma Glitter to the inside of the bottle:
I made a large fairy image to insert inside the bottle. Printed a vintage image on a transparency sheet and cut it out. Made wings out of Fantasy Film with cut Angelina Fibers inside and attached to the transparency image.
I had a difficult time trying to capture the fairy inside the bottle with my camera, it is easier to see in natural light.

Friday, August 13, 2010

Book Study - Hardware

In our ongoing book study project on NGS group, we are looking at the section on Hardware in Julia Andrus' book "Paper Transformed". This technique turns paper/die cut pieces into metal looking hardware. Start with a cutting out and adhering 5 - 10 pieces of matching die cut pieces. [Julia mentions if you want your piece to have more dimension cut out part of the piece and layer on, I didn't do this step]
Smooth out the rough edges with a file or sand paper.
Apply a coat of metallic paint and let dry.
If desired, distress the piece with sanding and/or hammering with texture.
Add additional acrylic paints to create a patina. I rubbed on several colors in spots and covered it all with the q. nickel azo gold, and let dry.
Here's a close up:
Love how chunky this piece appears.

Monday, August 2, 2010

Steampunk ATC

The theme for the August ATC swap in one of my groups is "Steampunk". Started with some background paper that reminded my of lab notes. One of my favorite tools, is a manila folder with an ATC sized piece cut out. I place this over the paper to decide which portion to use in my project. The lower piece is the one I choose.
Rubbed antique lined Distress ink over the paper, then used vintage photo Distress ink to create a stamped border around the ATC.
Added a vintage image and some metal gear like pieces. If you click on the photo below you can see the details of the small metal pieces used to create a "mask" on the image face.
I call this piece "Fly Me to the Moon", hope it qualifies as Steampunk.

Sunday, August 1, 2010

Book Study - Filigree

We're studying the section on Filigrees from Julia Andrus' book "Paper Transformed" this week on NGS group. Filigrees are lacy metal ornaments with lots of open areas. Julia states that you can make these out or purchased die cuts or make your own dies, punches or even cutting by hand. Start by adhering two to four matching die cuts together. I cut mine out of dark brown card stock with a Cuttlebug die. Julia instructs us to paint the piece with any metallic paint and add a top coat as desired. I painted my piece with Lumiere Metallic Bronze.
Added some texture to the piece, by heating with a heat tool until some small bubbles appeared.
Then added a light top coat of dark patina acrylic paint. I like how it looks like distressed metal:
Decided to experiment with some paper scraps I had that would not require any additional painting.
This piece is black paper that I had brushed on left over Perfect Pearl washes when working on other projects (I don't like throwing out left over washes or paints):
Used the same die to cut out the shape from this paper and the under layer with plain black paper and glued the two together:
Found a scrap from a Worksheet Wonder paper:
Used the same die to cut out a piece, along with 3 more layers from plain black paper and adhered them together: