I decided to give this technique a try, I have not had any luck with ink jet image transfers. I've heard great things about this method.
Choose an image (I picked a photo I took of a door in a warehouse) and print on the rough side of a transparency sheet for ink jet printers. It was also recommended when using light weight paper to coat the paper with gel medium and let it dry.
Next spread an even layer of gel medium over the rough (inked) side of the transparency sheet and let set for a moment.
Place gel side down on the paper and lightly brayer or use a bone folder to press the image down on your paper. Let sit for 2 to 5 minutes. Lift one corner to see if you need to apply more pressure.
I tried this multiple times using more and less gel medium and this was the best image transfer I was able to do. not very good. No matter how much gel I used, I could not get the majority of the ink off the transparency. I wonder if it's the type of printer and ink I have????
This might be one of those techniques I need to do with someone who has more experience and success than me.
Tuesday, November 22, 2011
Monday, November 21, 2011
Heated Oil Pastels ATC
Cut an ATC sized piece out of the Heated Oil Pastel background made on black card stock that I made earlier. Stamped some text with white Brilliance ink onto the background.
Added a couple of images.
H is for Heated Oil Pastels
You can find great instructions and many pictures on Trish's site.
Heat your iron, touch an oil pastel on to the hot iron.
Iron melted pastel on to parchment paper, moving the iron around.
Continue adding more colors to the parchment paper in the same manner until you have a large pool of harden pastels. Trish had a much thicker pool of the melted pastels on her parchment. My pastels seemed to just spread out instead of piling on top. I wonder if it's because I'm using water soluble oil pastels? I used a mixture of blues and some purple oil pastels.
Place a piece of card stock face down over the hardened melted pastels. Iron the back of the card stock to re melt the pastels and transfer them to the card stock.
The top piece of card stock was used to clean the melted oil pastels off the iron, then placed down on the melted oil pastels on the parchment to pick up more of the oil pastels. The bottom piece was use as described above.
Did another sample using a mixture of colors of oil pastels and black card stock.
Fun technique!
Heat your iron, touch an oil pastel on to the hot iron.
Iron melted pastel on to parchment paper, moving the iron around.
Continue adding more colors to the parchment paper in the same manner until you have a large pool of harden pastels. Trish had a much thicker pool of the melted pastels on her parchment. My pastels seemed to just spread out instead of piling on top. I wonder if it's because I'm using water soluble oil pastels? I used a mixture of blues and some purple oil pastels.
Place a piece of card stock face down over the hardened melted pastels. Iron the back of the card stock to re melt the pastels and transfer them to the card stock.
The top piece of card stock was used to clean the melted oil pastels off the iron, then placed down on the melted oil pastels on the parchment to pick up more of the oil pastels. The bottom piece was use as described above.
Did another sample using a mixture of colors of oil pastels and black card stock.
Fun technique!
Saturday, November 19, 2011
Book Study - Sponge Rollers and Art Foam
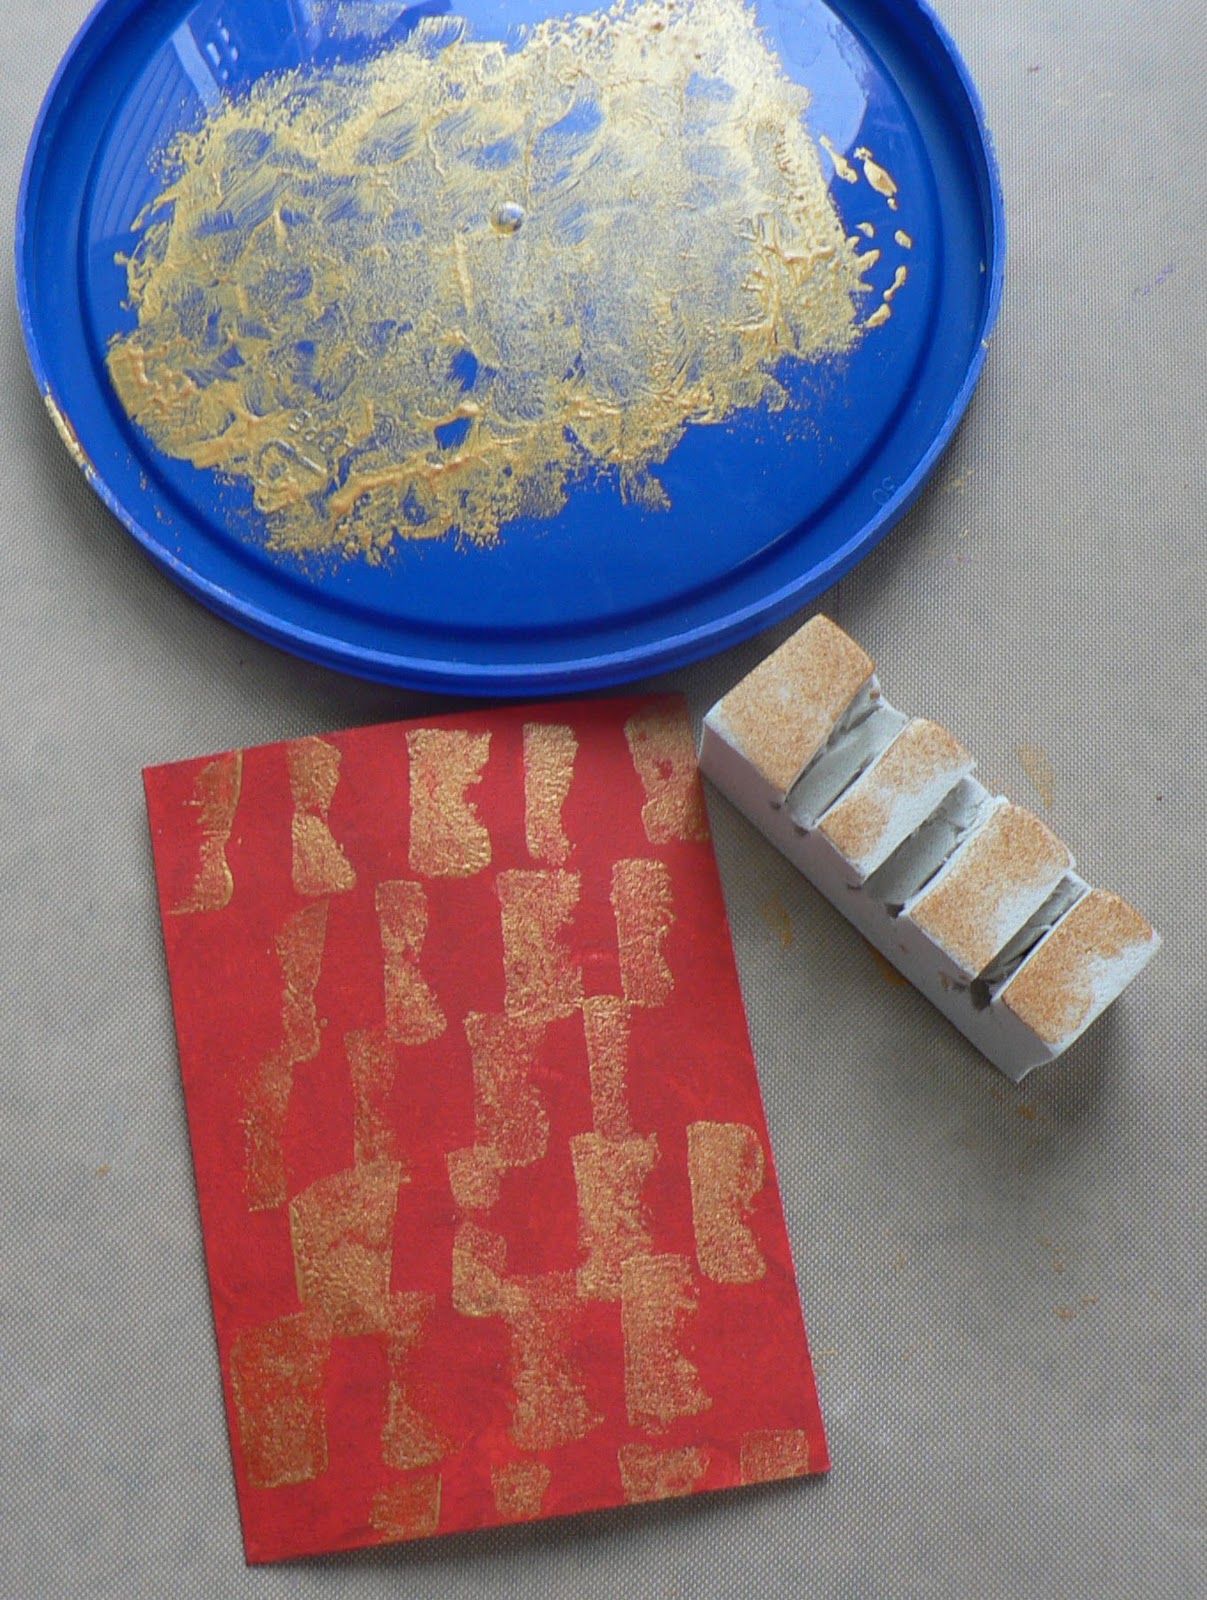
On NGS group, we're doing a study of Darlene Olivia McElroy & Sandra Duran Wilson's book "Surface Treatment workshop" . This weeks' section is using Sponge Rollers and Art Foam. The authors state that this technique can be combined with already-painted surfaces and other surface treatments. I painted some Manila folders with black & red acrylic paints in different proportions. Let the paint dry.
One option is to cut inexpensive paint brushes to create texture. I cut notches out of one brush and used it to create lines with gold Lumiere paint. These brushes come in a variety of widths.
You can also cut out notches from sponge rollers to get a similar effect. I didn't want to cut my only sponge roller, so used another suggestion by the authors, to wrap a rubber band (rubber bands also come in a variety of widths and sizes, experiment!!!) around the sponge roller, and use it to apply paint to your surface. I like this pattern on my background.
Another option is to use art foam (which I'm not familiar with), to cut and apply paint. I used a foam piece that came in the packaging of a set of Tim Holtz texture fades. On one surface I cut out sections of the foam to create a chunky line design. You can use the cut foam to stamp on paint ,
you can also use the cut foam to pull the paint over your surface.
Remember to wash acrylic paint off your brushes, sponge and foam immediately. The authors mention that you can paint on different colors on the art stamp at one time. They also state if your acrylic paint dries to quickly to add some glazing medium to your paints to extend the drying time. Or you may find the quick drying paint gives you a grungy effect as a happy accident. The authors also give variations to achieve a variety of stripes and grooves.
One option is to cut inexpensive paint brushes to create texture. I cut notches out of one brush and used it to create lines with gold Lumiere paint. These brushes come in a variety of widths.
Another option is to use art foam (which I'm not familiar with), to cut and apply paint. I used a foam piece that came in the packaging of a set of Tim Holtz texture fades. On one surface I cut out sections of the foam to create a chunky line design. You can use the cut foam to stamp on paint ,
you can also use the cut foam to pull the paint over your surface.
Wednesday, November 16, 2011
"H" Technique ATC
This month at ArtVentures group we are making ATCs using "H" techniques. Started with the Hatched-Line Texture backgrounds, colored the edges with a gold Krylon leafing pen. Punched heart shapes out of the Heated Pearls paper and colored the edges with gold Krylon leafing pen.
Used gold rub-on wings over white card stock and cut out the wings and glued under the heart. Added a "HOPE" charm to the bottom of the heart.
Tuesday, November 15, 2011
Architecture ATC
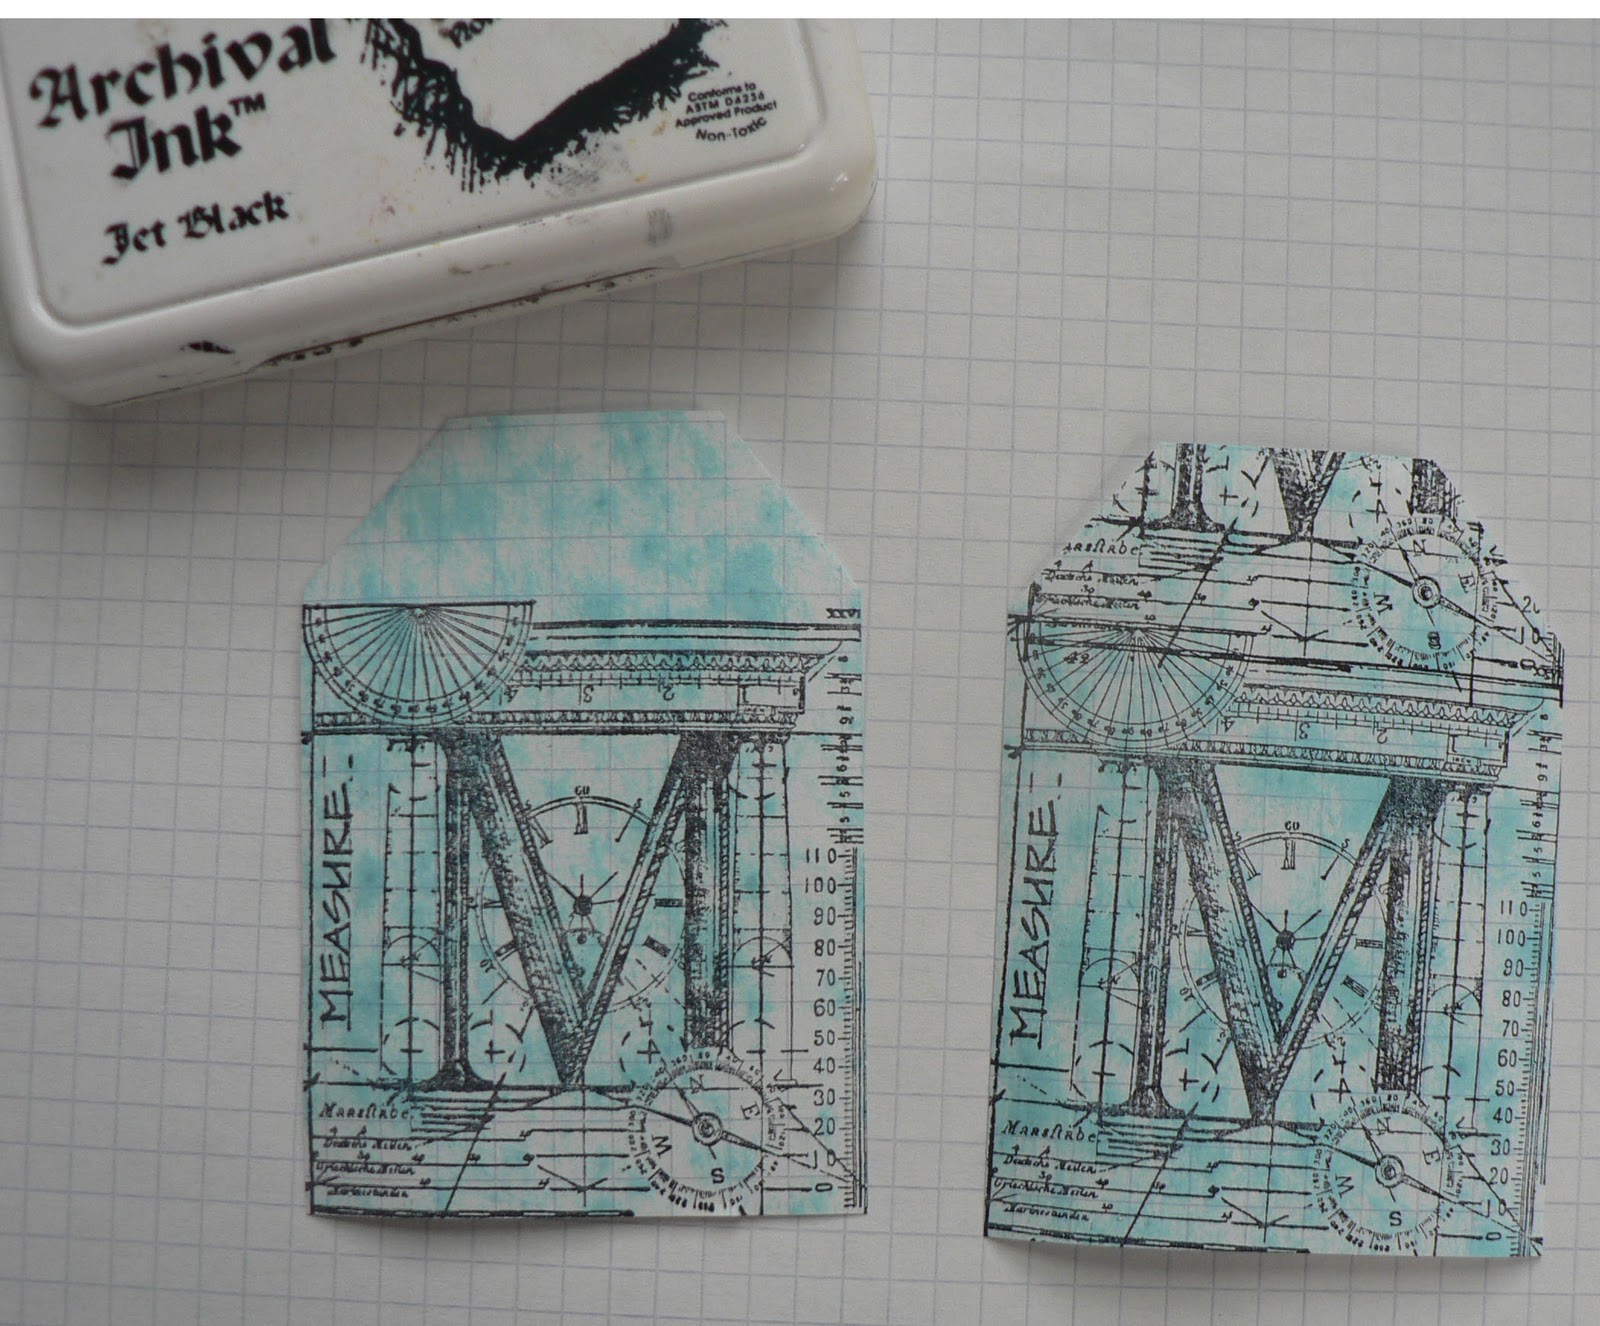
This month's theme is architecture, that makes me think of blue prints and plans. Took some graph paper and rubbed a light blue Distress Ink pad over the paper that was laid on worksheet paper with melted embossing enamel on it. This gave a nice blotchy application of ink.
Trimmed the paper into a house/building shape. Stamped on a large stamp twice with black Archival ink to cover the paper.
Sponged on tea dye Distress Ink over most of the paper. Heavily covered the edges with black Archival ink, then a thinner application of copper StazOn ink. Used a pencil eraser to color some stamped areas with the copper StazOn ink.
Added a measuring tape ribbon that was sponged with the same Distress ink and edged with the copper ink. Glued on some small gear bits.
Trimmed the paper into a house/building shape. Stamped on a large stamp twice with black Archival ink to cover the paper.
Sponged on tea dye Distress Ink over most of the paper. Heavily covered the edges with black Archival ink, then a thinner application of copper StazOn ink. Used a pencil eraser to color some stamped areas with the copper StazOn ink.
Added a measuring tape ribbon that was sponged with the same Distress ink and edged with the copper ink. Glued on some small gear bits.
Sunday, November 13, 2011
H is for Hatched-Line Texture
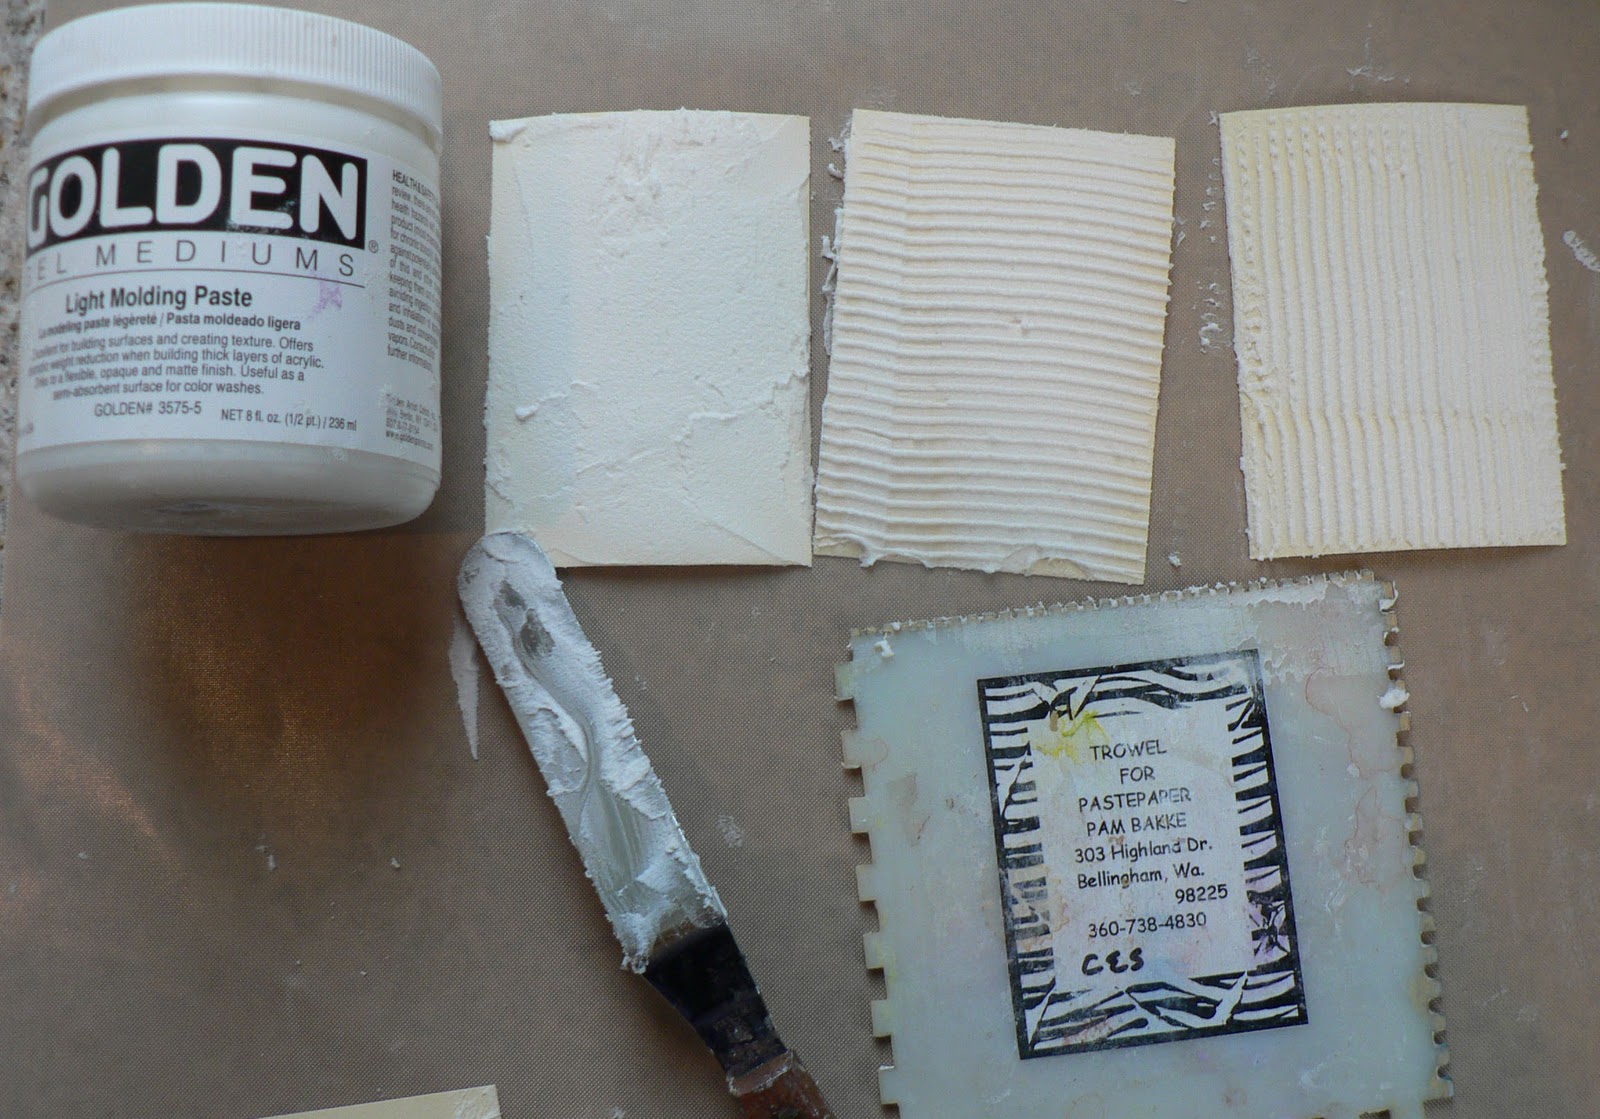
This technique is from the book "acrylic Revolution" by Nancy Reyner.Start by applying a thin layer of acrylic molding paste (as I did) or gel to your surface with a plate knife. Smooth the surface as evenly as possible.
Then gently drag a comb through the wet paste from side to side. Wipe off the excess paste with each swipe of the "comb". Then repeat making vertical lines. Be careful to use a light touch with the "comb" or you will erase the horizontal lines as I did here.
Easy to fix, I re swiped the comb in the horizontal direction with a light touch. I don't mind that my "hatching" is a bit erratic. Now for the hard part, let the paste dry.
Color the hatched lines with undiluted paint, diluted washes or a combination.
I used indigo Lumiere paint for the first layer to completely cover the paste. Then erratically brushed on some turquoise Lumiere paint and created a light shimmery purple to brush on by mixing d. purple and pearl white Lumiere paint.
Here is one of my finished backgrounds.
Subscribe to:
Posts (Atom)