We're doing a Book Study as a group on NGS. We are using Nancy Curry's book "Texture Effects for Rubber Stamping". This is another card inspired by her Silent Whispers card. I wanted to make a card much like the card in her book. I love the color combination greens & purples. I started by stamping flowers with VersaMark ink on glossy card stock. Then heat set.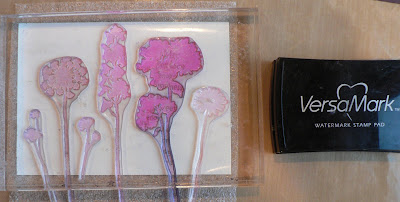 I taped down a torn strip of masking tape and sponged on a blend of three shades of green dye inks with a jumbo dauber. Remember to rub on the dye ink firmly to expose the resist images. Rub the ink from the edge of the masking tape toward the right edge of the card.
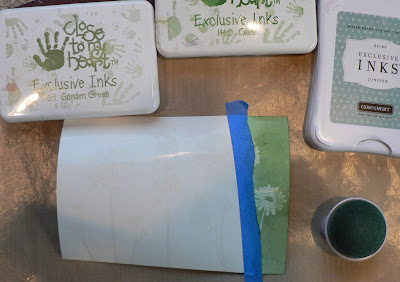 I moved the masking tape and using a clean jumbo dauber, sponged on a blend of just the two lighter shades of green dye inks. I noticed on this card ( not the previous one I did with the same card stock) that the masking tape created a lighter shade of the blended inks. Looks great, so that doesn't bother me. It's just a curious event!?!?!
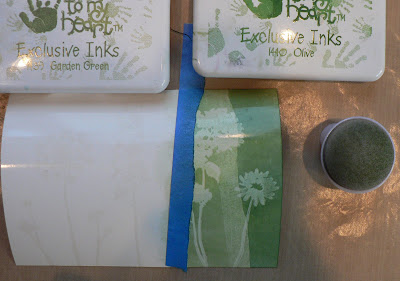 I continued to ink the card stock in this same way, until the whole card was covered.
 I over stamped the flower images, using purple Adirondak ink on the flowers and the darker green dye ink on the stems.
 Next, I over stamped several of the floral images with a lavender Brilliance ink, covered it with clear embossing powder and heat set.
 I stamped a saying with black Archival ink, mounted this piece on to white card stock and added three small metal dragonfly charms, that I colored with Eggplant Alcohol ink. (Sorry for the glare on the card.)
I taped down a torn strip of masking tape and sponged on a blend of three shades of green dye inks with a jumbo dauber. Remember to rub on the dye ink firmly to expose the resist images. Rub the ink from the edge of the masking tape toward the right edge of the card.
 I moved the masking tape and using a clean jumbo dauber, sponged on a blend of just the two lighter shades of green dye inks. I noticed on this card ( not the previous one I did with the same card stock) that the masking tape created a lighter shade of the blended inks. Looks great, so that doesn't bother me. It's just a curious event!?!?!
 I continued to ink the card stock in this same way, until the whole card was covered.
 I over stamped the flower images, using purple Adirondak ink on the flowers and the darker green dye ink on the stems.
 Next, I over stamped several of the floral images with a lavender Brilliance ink, covered it with clear embossing powder and heat set.
 I stamped a saying with black Archival ink, mounted this piece on to white card stock and added three small metal dragonfly charms, that I colored with Eggplant Alcohol ink. (Sorry for the glare on the card.)
I like this card the best of the ones I made today.
8 comments:
I love all the book study stuff - I was looking at the book last night and admiring Nancy's work. Your samples are really beautiful. Oh, and I love the princess dress - soooo cute.
Beautiful effect Carol! I tried this technique a while ago, but not with the masking tape, and I never would have thought to overstamp. I really like the subtle shadings you've achieved.
Hi Carol
Love everything on this page. I just need a little time to try them out. Your step by step approach is excellent.
Carol C
This is super Carol!!!! I just love how you blog the steps. There should be no problem with members trying out these techniques. I'd better get with it myself!!!
Thanks so much for heading this project up.
chrissy
WOW, this turns out really really good! I'll have to do this one! Thanks for the detail tutorial!
Thank you for these wonderful step by step examples. I am always amazed at the generosity of you and a few others in our group.
Beautiful pieces.
xxxxxxxx
Glorious Carol!! In fact, I find your photo-tutorials easier to follow than the book¬! I get books messy... ;)
Post a Comment