Tuesday, August 28, 2012

Birthday Book Page

I've signed up for a Birthday Club swap. During the month of the participant's birthday, we send a decorative 4x4 sturdy page, that they can bind into a book. Theme of our choice, embellish as we like, leaving room at one edge for binding, and message on the back. I've made the first one, using one of the masking over acrylic painted backgrounds done earlier. 
Started with the back first. Stamped some flourishes with gold StazOn metallic ink. Rubbed off the acrylic paint in one area with a baby wipe. Stamped a message with black Archival ink. Added gold StazOn metallic ink to tips of paper flowers. 
 Dabbed on wild honey Distress Ink over the exposed gesso and the yellow acrylic paint. Stamped happy birthday with black Archival ink in lower right corner.
 Now to the front. Stamped a saying with black Archival ink. Outlined the bird images and added eyes with glitter Gelly Roll pens.
 Used a gold metallic Gelly Roll pen to add dots. Colored edges of paper flowers with gold StazOn metallic ink. Used glitter Gelly Roll pens to add color to the white floral ends. Layered together and added a large metal flower brad, and added a "pearl" to the center of the flowers.
 Added a clock face to a brown paper flower with copper StazOn metallic ink to the tips. Attached a bronze colored dragonfly brad, attached to upper left corner. Assembled previous inked paper flowers with a large gold colored brad and added another bronze colored dragonfly brad to the lower left corner.
One done.

Rusted Enamel ATC

I used the Rusted Enamel background I made last year. Added a vintage image with some words stamped with Sepia Archival ink, used same ink to color edges of image and the rusted enamel background. Added two metal corners.

Monday, August 27, 2012

Resin Fresco ATC

Making more ATC samples of various techniques to go in my ABC of Techniques ATC Album. I choose one of the Resin Fresco backgrounds I made a while ago. Colored the edges with Sepia Archival Ink.
 Stamped a blueprint image over the background with Sepia Archival Ink.
 Printed a Da Vinci image colored the edges and stamped part of the blueprint image and a saying with Sepia Archival Ink and layered over my background.

Saturday, August 25, 2012

Compendium of Curiosities 2 Challenge #19 Kraft Resist

I'm participating in the 18th Challenge from Tim Holtz's book "Compendium of Curiosities 2"  on Linda's blog. This week the technique is Whitewash Stamping on pg. 41 of Tim's book.  I made an ATC background, some flower and leaf parts and a bird shape out of Kraft Resist and colored them following the instructions in Tim's book.
 Stacked the flower shapes together and bent some leaves and added a metal rimmed rhinestone brad in the center of each to make 3 flowers.
 Attached the flowers to the ATC background using the brad centers. Colored the edges of the ATC background and the leaves with vintage photo Distress Ink. Also sprayed the leaves with Perfect Pearls Mists.
 Colored the edges of some chitchat stickers and the bird shape & bird wing with vintage photo Distress Ink. Adhered to the ATC. Added a metal rimmed rhinestone brad to the bird for an eye.
This was a fun project and most of it is made with Kraft Resist!

Friday, August 24, 2012

Masking over acrylic painted backgrounds

Decided to play with masking over acrylic painted backgrounds for an upcoming swap. I painted gesso over both sides of cardboard. When it dried I painted them with bright yellow acrylic paint, dried. Stamped on orange circles with acrylic paint, dried. Sponged red acrylic paint over sequin waste, dried. Stamped on diamond like shapes using purple acrylic paint on a bit of foam packaging, dried.
 I'm making all the backs about the same. Placed a clock mask over the background and sponged on blue acrylic paint with a large dauber (wash paint off mask immediately).
 A fun background to play with later.
 I used assorted masks over the front sides to create these backgrounds for a variety of looks.
Now to contemplate the next step.....

"R" Technique ATC

We are up to the letter "R" in our ABC's of Technique ATC swaps in the ArtVentures group. I used the Re-Inker Splash backgrounds I made earlier for these ATCs. Then stamped the umbrella man with azure StazOn ink. If you use a dye ink, it well blend into the background and hardly be seen. If you use pigment inks, the will not dry on glossy card stock and will need to be embossed. I didn't want to emboss this step, so I choose a solvent ink.
 Next, stamped a saying about "Rain" over the background with black Archival Ink, also colored the edges with this ink.
 Stamped a dotted background stamp over all with tumbled glass Distress Ink, covered with clear embossing powder and heat set. I think this looks like rain, so cool.
 Colored in the open bits of the letters with a white gelly roll pen.
 Added a dance related ribbon to the bottom of the ATC.

Tuesday, August 21, 2012

Doodled "H" ATC

Choose one of the Metallic Markers background I made earlier, for the background of an "H" doodled background for the Unleashed Doodling A-Z for the ArtVentures Group.
 Drew an outline of a large "H" with a silver metallic Sharpie marker.
 Didn't want to completely cover the background within the "H". Used a white Gelly pen to draw doodles and dots inside the outline.
 Another type of doodled lettering done. I think this is a Happy "H".

Monday, August 20, 2012

Compendium of Curiosities 2 - Challenge #18 Whitewash Stamping

I'm participating in the 18th Challenge from Tim Holtz's book "Compendium of Curiosities 2"  on Linda's blog. This week the technique is Whitewash Stamping on pg. 47 of Tim's book. And the Funkie Junkie Boutique is sponsoring this week's challenge with a $25 gift certificate to one lucky participant. I followed the instructions in the book to make this background for an ATC:
 I also did the Whitewash stamping technique on a cut out heart, but skipping one of the steps in the book. Colored the edges of the atc and the heart with brushed corduroy Distress ink. Stamped a saying on the heart with black Archival ink. Adhered the heart over paper lace on to the background and added white floral brads.


Comfort Quilters Quilts

Some quick quilts to bring comfort to others.


Tuesday, August 14, 2012

R is for Re-inker Splash

R is for Re-inker Splash, another fun technique from the Technique Junkie Newsletter
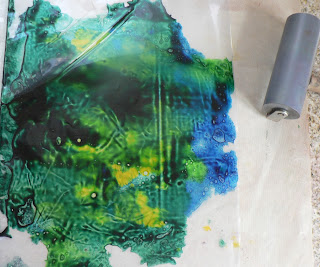
The technique uses a clear plastic report cover. I didn't have one of those, so I took a large thickish plastic piece of packaging (I think it held replacement scrapbook cover pages). I cut off three sides, leaving the one folded edge in place to create my own "cover". The dropped assorted co-ordinating dye re-inkers onto the sheet. (You can use pigment and/or metallic re-inkers, but you'll need to coat with embossing powder and heat set at the end, because those inks do not dry on glossy card stock).
 Close the cover and use a brayer to blend the inks.
 Open the folder and place two sheets of glossy card stock shiny side out in the folder.
 Close the cover and use the brayer to spread the ink over the glossy card stock. Leave white space as desired.
 Open the cover and remove the card stock. Looks cool!
 You can keep adding glossy card stock to use up the inks. I decided to add some more yellow and blue inks on each side first.
 Again, placed two sheets of glossy card stock, shiny side out, close the folder and brayer over all.
 Here's how these looked:
 Then I place two more sheets of glossy card stock in the cover, moving the card stock around with in the cover to pick up most of the inks. I like how they look also!


Monday, August 13, 2012

Compendium of Curiosities 2 Challenge 17 - Creative Core'dinations

I'm participating in the 17th Challenge from Tim Holtz's book "Compendium of Curiosities 2"  on Linda's blog. This week the technique is Creative Core'dinations on pg. 61 of Tim's book. And Simon Says Stamp is sponsoring this week's challenge with a $25 gift certificate to one lucky participant.
Following the directions in the book, I created an ATC background on the left using tea dye Distress Ink. I didn't quite follow the book in making the wings on the right. Instead of Distress Ink, I used gold acrylic paint Dabber.
 Added a vintage image over the creative core'dinations wings and adhered to the background. Used some of Tim's measuring tape ribbon and Chitchat stickers. Added a small butterfly sticker.


Friday, August 10, 2012

Clear Layer ATC

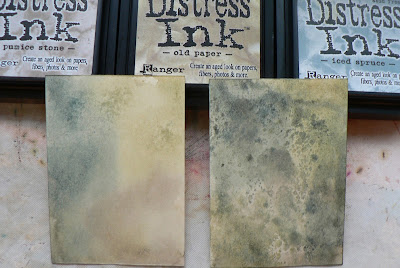
This month's theme for 9ATC group is clear layer. I made the background with the Wrinkle Free Distress technique with these ink colors.
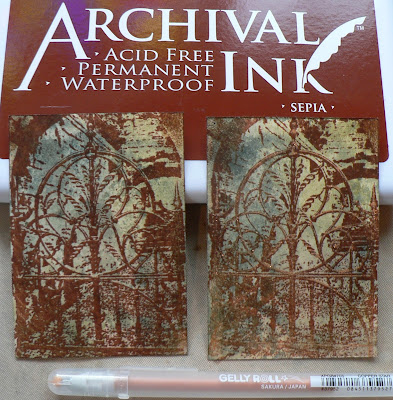
 Stamped a metal gate image in front of an alleyway with sepia Archival Ink. Colored the gate with a metallic  copper star Gelly Roll pen.
 Love the shimmer!
 Stamped the word DREAM and edges of the card with black soot Distress Ink. Covered with Antique Rust embossing powder and heat set. Outlined the letters with the metallic copper star Gelly Roll pen.

 Stamped a castle image on light blue card stock. Cut out with 1" circle punch. Colored with Distress Markers, blue metallic belly roll pen and a gold metallic pen.
Used 1" round epoxy dot over the castle image as my "clear layer".  Placed it in the center of the small circle in the decorative gate.
 Here's the finished ATC: