Wednesday, December 29, 2010

ATCs made with Embossing Scraps Background

I took one of the Embossing Scrap backgrounds I made and colored the one white paper with Distress Ink. Cut out a key shape from a dictionary page. Colored the page with gold Encore! Ink and layered it on black card stock. Colored the edges of the key with black Archival Ink and covered with clear embossing powder and heat set.
Layered the key and a vintage image to the background along with metal tag tied on with ribbon.
On the other background I added a vintage image and some musical notes.

Book Study - Embossing Scraps

On NGS group we are studying Bernie Berlin's book "Artist Trading Card Workshop". This week section is on Embossing Scraps. Glue down various scraps of paper to your ATC card using a glue stick. Be generous with the glue stick, so some of the glue oozes out. Then brayer the pieces down.
While the glue is still wet cover the card with embossing powder (using the color of your choice).
And heat set. Here's the one where I used gold embossing powder.
On this one I used black embossing powder.

Saturday, December 25, 2010

Merry Christmas

Then the angel said to them, "Do not be afraid, for behold, I bring you good tidings of great joy which will be to all people. For there is born to you this day in the city of David a Savior, who is Christ the Lord. And this will be the sign to you: You will find a Babe wrapped in swaddling cloths, lying in a manger." And suddenly there was with the angel a multitude of the heavenly host praising God and saying: "Glory to God in the highest, And on earth peace, goodwill toward men!" Luke 2:10-14

Wednesday, December 22, 2010

ATC with Emboss Resist background

I took the background I made using the Emboss Resist technique and colored the scrap paper on it with Distress Ink.
I cut out an image of a cemetery angel and made out a gown from the scraps that ironed off the paint and embossing powder from the emboss resist background.
Punched out decorative corners from metallic paper and glued to the corners. Added a girl's image to a small metal frame and attached to the ATC under the angel's hand.

Book Study - Emboss Resist

On NGS group we are studying Bernie Berlin's book "Artist Trading Card Workshop". This week is the section on "Emboss Resist". I took this as a workshop with Bernie two years ago, it was lots of fun and I loved the backgrounds. You can use more than one color of paint, if you desire.
Paint your card with acrylic paint and let dry. This is the color that will be revealed through the resist.
Stamp an image over the paint with clear embossing ink, sprinkle on clear embossing powder and heat set.
Lightly paint over the entire surface with a contrasting color of acrylic paint and let dry.
Place your card on a heat resistant surface, then place a piece of scrap paper over your card and use a hot iron over the paper. Use lots of pressure and move the paper around quickly so it doesn't stick to the card. Save the scrap that picks up the top layer of acrylic paint and the embossing ink.
Here is my background, I don't mind that some of scrap paper stuck to my background, I'll make it work.

Thursday, December 16, 2010

Book Study - Fun Foam

6On NGS group, we are studying Bernie Berlin's book "Artist Trading Card Workshop". This week's section is "Fun Foam". You can use pre-cut fun foam shapes or cut your own. I used a Tim Holtz die to cut out a lock shape. Adhere the fun foam to your ATC back with gel medium and let dry.
Cover the fun foam and card with a layer of gesso, let dry. Then paint over the whole thing with acrylic paint color of your choice and let dry.
Bernie suggests using quick-drying pigment ink for the next step. I've been wanting to use this copper StazOn ink I picked up. I created my own ink pad by using a piece of cut n dry foam. Used a large script stamp to stamp the copper ink over the foam and card and let dry.
I really liked how this turned out:
I printed some images on to a transparency, cut them out and adhered them to the card back. Colored some numbers from a turn phone book page and glued to the side. Cut out some dictionary page with the word "care" and glued to the inside of the key hole. And added two brads. Fun!!!!

Saturday, December 11, 2010

Christmas Cards with background papers

I had so much fun making Christmas ATCs out of various backgrounds from the book studies we've been doing on the NGS group , I decided to pull out more of these backgrounds along with some other backgrounds I've made this past year to make Christmas cards as well.
A vintage Christmas image is layered onto a Leafing Pen Resist background and layered onto a natural card with speckled texture stamped on with gold Encore! ink. Stamped holy onto gold metallic paper with dark green StazOn ink. Text stamped and embossed with gold detail embossing powder and added a gold star brad to the image.
Layered vintage Christmas image on to a Paint on Paper Towel background I'd made. Added a rhinestone snowflake to the image and a rub-on greeting. Layered the background on to a dark blue card with flourishes stamped on with silver Encore! ink.
Stamped an ornament with purple StazOn ink onto silver metallic paper and layered onto Brayered Gesso Resist backgrounds using sequin waste. Stamped on Merry Christmas and used Silver Pearl embossing powder. Colored the edges with a silver leafing pen. Layered onto a blue-grey card that I inked with silver Encore! ink over sequin waste.
Stamped a tree image with dark green StazOn ink onto gold metallic paper. The purple layer is one of the Water Stamping backgrounds I'd made. Layered this onto dark green card stamped on flourishes with gold Encore! ink. Added a gold star brad to the top of the tree.
Stamped a Santa image with black StazOn ink onto red paper. The background is one of the White Glue Crackle technique sheets I made. I ran this through a snowflake Cuttlebug embossing folder to add texture. Layered onto a black card after adding a black ribbon with brass buckle.
Love using the White Glue Crackle paper. Painted white acrylic paint over the blue sample, let dry, then stamped on a snowman image with black StazOn ink and cut out. Ran the snowman through the snowflake Cuttlebug embossing folder and sanded off the white paint on the raised areas. Added glitter glue to the snowman scarf. Layered the snowman onto a background made with Spray Starch and Mica Powders technique. Added some snowflake rub-ons onto the background above the snowman. Embossed the front of a white card with the snowflake Cuttlebug Embossing Folder.

Christmas ATCs

I want to send out some Christmas ATCs to some friends. Decided to use some of the backgrounds I've made in the various Book Studies we've done on the NGS group. I bit non traditional, but lots of fun.
This background is from the Inky Layers technique. Added a vintage angel image, a small brass star and black rub-on letters to spell hope.
This was the other Inky Layers background I made like above, but with other colors. Stamped Merry Christmas with black StazOn ink, added vintage angels image and black glittery musical notes.
This background was one of the Paint on Paper Towel technique samples. Added a vintage angel image, metallic edged ribbon and brass star and a dictionary definition of adoration.
This background is one of the watercolor plastic wrap backgrounds I made. Added vintage angels image, large black glitter notes and a dictionary definition of sing. Layered all onto black glittery card stock.
This background is the Lapis Lazuli technique. It makes a wonderful heavenly sky. Added a calendar tissue tape, vintage angel image with house, and colored the edges with a gold leafing pen.
This background was on of the Intuitive Watercolor technique backgrounds. Added a couple of vintage angel images, a rhinestone star, and an arch frame, that I had inked with gold Colorbox ink and stamped on musical sheet with black StazOn ink.
The background paper is from the Leafing Pen Resist technique. Added a large snowflake rub-on with a small rhinestone, vintage angel image, dictionary definition, and overlaid an arch frame that had musical sheet stamped on with silver Encore! ink.
The background was from the second stencil background I made. Painted some dictionary pages, tear and layered over an arch frame. Added a vintage angel image, gold star brad and a dictionary definition of adore:
This was a very fun way to use some of my backgrounds.

Friday, December 10, 2010

Book Study - Tissue Paper

On NGS group we are studying Bernie Berlin's book "Artist Trading Card Workshop", this week's section is "Tissue Paper". Paint a layer of gel medium to the card, then set white tissue paper over the wet gel medium and gently press down to smooth out the tissue.
Apply another coat of gel medium over the tissue paper and crumple up more tissue paper and press into the card with more gel medium. Create as many or as few creases/crumples as you desire.
Either while the gel medium is wet, or allow it to dry, then brush on acrylic paints as desired. I brushed on a mixture of blue and white acrylic paints while the gel medium was still wet. Added blue paint to the edges. Bernie states that you can embed small objects into the wet tissue paper if you desire.
When the paint dried, I colored the raised creases with platinum Brilliance ink, added a large rub on snowflake, vintage angels image and some print from an old dictionary.

Wednesday, December 8, 2010

Distressed ATC

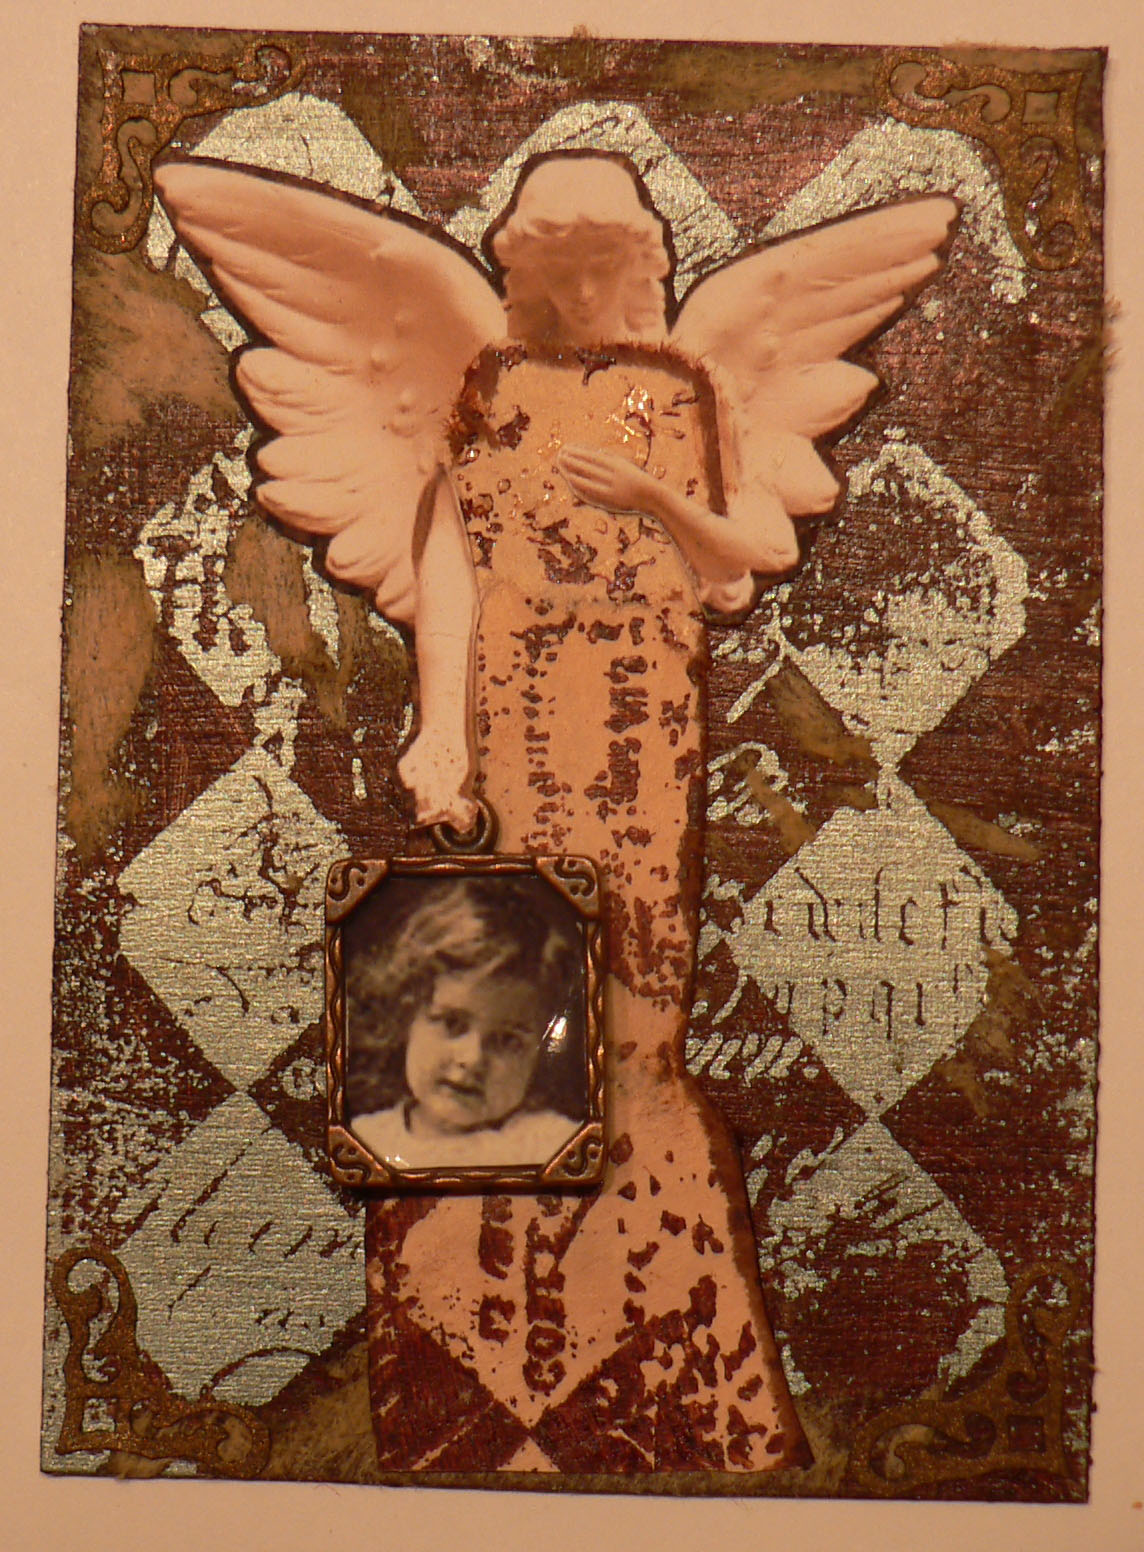
The theme for this month ATC is "Distressed". Started by running a tea dye Distress ink pad over an old decorative shopping bag.
Lightly misted the bag with water, wrinkled it up, open it and let dry. Then used a darker Distress ink pad to color the creases. Paper was cut and mounted onto ATC sized card stock, and the edges colored with this same Distress ink.
Choose a vintage photo and darkened the image in print shop. Roughly applied gold pigment ink to the edges, added Pebbled Copper embossing powder and heat set.
Adhered the image to the distressed background. Painted some brass crackle paint (Tim Holtz product) onto a flourish stamp and applied to 3 of the 4 corners. This paint has to dry on it's own. The instructions read "do not dry with heat tool". It's hard to see in this photo, but there a lovely fine crackles in the dried paint. Also added some decorative copper stickers and a yellow rhinestone.

Beaded Quilted Clutch Purse

I signed up for a Secret Santa Swap on Art-Ventures group. The instructions were "make a gift for your partner. Please put your best effort into this creation and make something that you are proud to give and would love to receive yourself!". I found a pattern to make small quilted clutch purses called "Snap Happy". I made the "large one" it measures about 7" x 6". Used some of my favorite batik fabrics and even did free motion sewing on my machine to quilt the fabric on the main body of the purse. Used some of my special bead stash to create embellishments on the pull tabs and to add a beaded dragonfly charm & decorative fringe to the side.
The decorative band around the top easily sips off the top to create a strap.
I added the charms and fibers to a blue glass bead that can easily slip off the strap, if the recipient would like to remove them.
I had lots of fun creating these beaded embellishments to the pull tabs. I highly recommend Beverly Gilbert's book "Beaded Colorways" it has lots of beading techniques, color theory, and great color wheels to play with.
I bought these dragonfly embellishments a few years ago and thought this was a great project to use them (sorry, I don't remember what they are called or who makes/sells them).
I just heard Cathee has opened her gift and loves it, so it's okay for me to post this.

Friday, December 3, 2010

Book Study - String

On NGS group we are studying Bernie Berlin's book "Artist Trading Card Workshop", this week we're looking at the section on string. Wrap string (or twine or yarn or other fiber) around the card, secure with one or more knots. Cover the entire front of the card and string with gesso and let dry.
Add images to the card with gel medium. Bernie used several images, placing some over the string. I wanted to use this image and wished I had added the yarn covered gesso afterwards, but I was able to get the image under the yarn. Bernie recommends softening the edges of the images with gesso, I achieved a similar look by tearing out the image I used.
Paint the card with washes of color. I made washes by adding acrylic glazing liquid with a mixture of acrylic paints. Let dry.
To finish my ATC, I painted and "broke" (with wire cutters) a lock charm using black alcohol ink, and attached to some of the yarn. Also added some words:
Check out Bernie's book, she has examples from a variety of artists using string on ATCs in a variety of ways.