Friday, October 8, 2010

Book Review - Paint on Paper Towel

On NGS group we are doing a study of Bernie Berlin's book "Artist Trading Card Workshop". This week is the section: Paint of Paper Towel. Bernie reminds us that there are many types and textures of Paper Towels. She also says that the texture is shown off well with metallic paints.
I tore a paper towel into 4 sections and painted on an assortment of Lumiere Paints and let it dry.For the ATC on the left, I adhered a whole section of painted paper towel over the ATC and decided to extend the paper towel to the back instead of trimming to the edge of the ATC. For the ATC on the right, I tore a couple of the paper towels into pieces and adhered them over the ATC. These backgrounds are now ready, or....
You can stamp over the paper towels with a large stamp. I used Midnight Blue StazOn ink on this one:
and black StazOn ink on this one:
Fun backgrounds!

Saturday, October 2, 2010

House Shaped ATC

On DCI group there is an ATC swap using House Shaped ATCs. I cut out house shapes on card stock and adhered some of the paper that had absorbed the excess ink from the baby wipe technique. Stamped on an image using black VersaFine ink and added black Distress Ink to the edges of the ATC.
Made a film strip embellishment by painting a blue acrylic wash over a dictionary page of names. Coated the back of Tim Holtz's "film strip ribbon" with liquid glass and adhered to the painted paper.
Used the film strip embellishment for the chimney. Added a metal decorative corner bit to the roof. Used a heart brad to attach a blue paper flower to the stamped image and added a couple of square blue brads.
A fun swap, looking forward to receiving what the others have created and excited to see what shaped is next.

Book Study - Watercolor on Baby Wipes

We are studying Bernie Berlin's book "Artist Trading Card Workshop". This week is the section "Watercolor on Baby Wipes". The instructions are tow set a clean baby wipe on a piece of scrap paper and then set on a piece of palette paper and randomly squirt liquid watercolor over the wipe. I don't have liquid watercolors, so I decided to use dye re-inkers and dropped ink over the wipe.
The dye re-inkers didn't blend well, so I added some water to help the ink spread, I went a little overboard. Bernie suggests setting the wipe and the scrap paper aside to dry.
The colors blended more than I wanted, but I love how the ink helps the patern of the wipe stand out (and the color is great). This can now be applied to an ATC or other paper to use as a background.
I had a scrap paper that had gesso over a stencil from another project. I like how it looks after absorbing the ink under the wipe.
Because my wipe was so wet, and I was a bit impatient for it to dry, I set the wipe between two sheets of printer paper and pressed to absorb some of the ink, and repeated several times. Now I have lots of papers to play with.
I did this technique again, without adding the extra water.
Wipe after it dried:
Some printer paper was used to absorb the excess ink:
Bernie mentions that you can also fold the baby wipe in half before adding the watercolors and later unfold to achieve a Rorschach inkblot test. I recommend Bernie's book, to see how the technique looks with the watercolor and see it used in ATCs.

Friday, September 17, 2010

Book Study - Intuitive Watercolor

We are starting another Book Study over on Next Generation Stampers. This time we are going through Bernie Berlin's "Artist Trading Card Workshop". I recommend getting this book, besides the fabulous technique and step-by-step directions with colored photos; Bernie shows other artist's ATCs using these techniques. This gives you an opportunity to see a variety of styles with using the same techniques. We are starting with the first technique "Intuitive Watercolor".

Cut watercolor paper to size. Dampen the paper with water, then drop on some color (using liquid watercolor or dye ink), spread the color over the paper with a wet brush.

Drop another color onto the wet paper and blow it around with a heat gun.
If desired, add more color and repeat with the heat gun.
When the paper is dry, look and try to envision shapes to outline. I had difficulty finding any shapes it this piece. Bernie says not to worry, if you don't see any shapes, just start doodling with a fine point black pen, shapes and images will come. I'm not sure about any images, but I liked how this has a stained glass appearance, especially having used the iridescent colors. I think this will make a good background for a project.
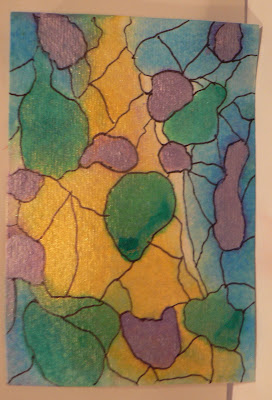
Decided to try again with another type of inks: Distress re-inkers. I found a little bit went a long way with this ink:
Dropped on some more Distress ink and blew around with a heat gun.
Noticed extra blue ink on the craft sheet, so wiped it up with the edges of the card to color the edges.
Dropped on some darker green, again blowing it around with the heat gun.
This time, I thought I could see a sea horse, so I outlined the sea horse with a fine-point black pen and added in some details.
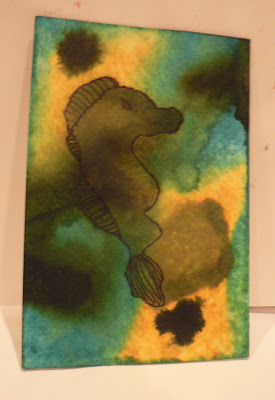
This reminded me of worn packaging, so I added some fish postage stamps, over stamped some script and postage images with brown StazOn ink, and added a few charms. What fun!

The best part of all this was I had never been interested in this technique. I didn't get it. This book review forced my hand and made me realize: I'm not supposed to "get it", I'm supposed to just play and let the random movement of the colors show me the way to go. Fun!

Comfort Quilts

Most of this year, I've been working on comfort quilts for a teen program. These are larger than the usual lap ones our group makes, about 60"x70", big enough to wrap around oneself. These will be joining ones made by others in our group, and given to the program director at the end of Sept. I hope this variety will be enjoyed and bring comfort.

Friday, September 10, 2010

Fabric Paper ATCs

I'm making ATCs with Fabric Paper. Started with cutting the Fabric Paper I made in the post below and ran it through an embossing folder and colored with Platinum Brilliance ink.
Took some Fabric Paper that I'd made earlier with Tyvek and cut it to be the base of wings for a dragonfly.
The die cut dragonfly was run through a Cuttlebug embossing folder and adhered to the main fabric paper and layered onto black card stock. Added black brads and a printed black ribbon.

Fabric Paper

I cut a piece of fabric out of an old pillow case for the base. Coated the fabric with watered down pva glue. Then covered with torn out paper napkins leaving small space between pieces and gently covering with more of the watered down pva glue.
Next, cover entire piece with sheet of tissue paper and covered with watered down pva.
Then painted over the piece with watered down acrylic paint. I wasn't gentle enough and tore out a section.
I added more torn out napkins to the hole in the piece and covered with a small piece of tissue paper and painted. Then sprayed on some pigment spray and some Perfect Pearls wash.
Here is what the sheet looks like when it dried (this took about 2 - 3 hours in the sun).