Couldn't resist signing up for this fun project on NGS. I hadn't done any altered book projects before. This one sounds so intriguing. Here's the info Trish tantalized us with "I thought what we could do is work on pages and spreads together as a group project - once a week or whenever I feel like it (!) - depends how obsessed I get....I'll give you an assignment for your board book - it could be something simple like paint pages this colour or that colour or stick this on or write this on the page - don't know yet what it will be but there will be something for you to do as group homework!First of if you already have your board books in your possession the first thing you need to do is to sand the pages and prep them ready - you don't HAVE to sand the pages if you don't want to as you can gesso the glossy pages instead - probably take about 2 coats if you want an even covering of gesso." While leaving the grocery store this week, they had a bin filled with children's books on sale. Bought a few for my grandchildren for their flight home and a couple of board books for me to play with. I sanded my pages and put one layer of white gesso over the first two pages. Yesterday, Trish gave us step one, and I was ready to play today.
Trish's instructions are in purple, with my commentary of what I actually did in black.
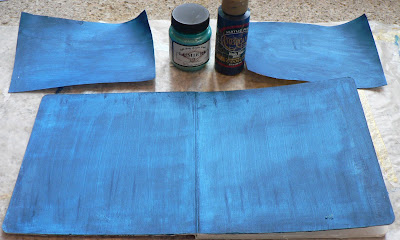
First thing I want you to do to the first 2 inside pages of your book, paint them a lovely bright cobalt blue - i.e. a true blue - remember that blue you used to paint with when you was at school? A perfect bright colour blue - no shade of - just blue. Find some paint in your stash - do NOT go out and buy anything!!! That's the rule - find some kind of paint medium - it could be acrylic or it could be watercolors or inks - anything at all so long as its come out of your stash.1. Paint the first 2 board book pages with that blue....Okay, no buying anything new, and I have no true blues. I painted the pages with navy blue acrylic paint, and while it was still damp painted over it with a Turquoise Lumiere to lighten the color. Love the shimmer, not wanting to waste the lovely paint on the brush, I quickly covered two pieces of card stock for future use.
2. Open a glossy magazine - any magazine. And quickly flip through it, find the first page you come to which has a bright interesting bold pattern on it - can be a pattern on a dress, large bold text, or an advert or a background -anything bold which stands out, but it mustn't have the colour blue in it!! Love the sound waves in this ad: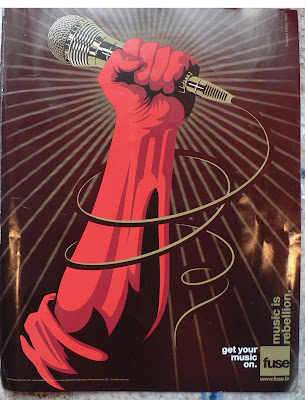
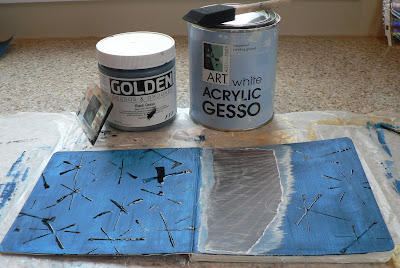
3. Rip a section of the magazine pattern from the page large enough to cover up approx 25% of either the left or the right hand book page. Tore out a section of the sound waves. 4. Glue the patterned paper down into the book.5. Take some gesso, and water it down slightly if it is thick stuff, if your gesso is thin then you don't have to.6. Lightly brush over the magazine paper pattern and also across the edges of the paper where it is glued onto the book page - in other words the gesso is overlapping both the patterned paper and the book itself. You don't want a thick covering of gesso as you still want to be able to see the actual design in the pattern through the gesso. Thought I had thin gesso, but not enough to let the pattern show through, I quickly took a wet brush across to remove some of the gesso. Like how the brush strokes appear more intense at the right edge. Let the gesso dry. Decided I could do the next step while the white gesso was drying. 7. Take some black paint, or black gesso, and very sparingly use the edge of a credit card to 'slice' the paint onto the book - do not cover the patterned paper - just on the book pages. Less is more don't go overboard. Oops, I don't think I comprehend the not going overboard LOL. Also my hands aren't very steady. Crisscross and overlap your paint slices - in other words your making lines with the black paint across the blue background using the edge of a credit card. Let the paint dry.
8. Take some more thinned down gesso and apply it sparingly over some - not all of the lines you have drawn with the black paint and credit card in little cloud like blotches, you want to still be able to see the blue paint visible through the gesso - don't white it out totally, let it dry. Since I don't like the way I draw or paint, I used a sea sponge with the white gesso to make the little clouds. Not sure what this "sparingly" thing is LOL. Also, not too good at reading instructions, I thought one cloud was to be intense.
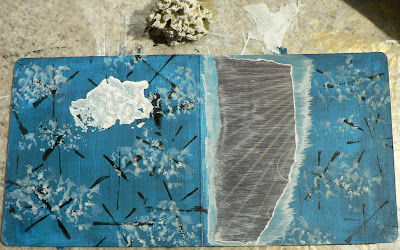
9. Using the gesso again paint a very white prominent thin strip across one of the pages - either across the top or bottom or vertically on the left or right hand page - doesn't matter where. Don't paint it too thick. You can use masking tape to help you make a straight border if you want to. Let it dry. Pretty straight line, for an unsteady hand.
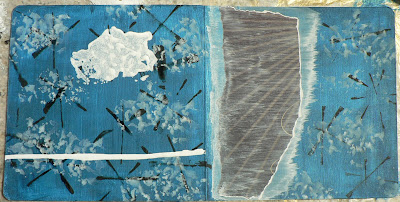
10. Take a scan of what it looks like now and upload it to the folder in the groups photo albums.When you've done that, give me a shout and we'll start working on the next layer on the page.Don't worry about what it looks like at this point in time cos it isn't finished! So exciting to just create without and end point in mind. Better go upload my photo to the folder.
2 comments:
Hi Carol - I think we are going to have fun with this board book - I love your blog! thanks for sharing your ideas
Cheers
Trizzy
I love how youve took photos of all the steps! Now I better get working to decide what we are gonna do next for this project! Eeeek!
Post a Comment