Monday, February 25, 2013

ATC based on Tim's Feb 2013 Tag

This ATC is based very loosely on Tim Holtz's February 2013 Tag. Rubbed spiced marmalade Distress Stain over Manilla card stock, partial dried with a heat tool, spritzed with water, then continued to dry with heat tool. Repeated these steps with aged mahogany Distress Stain. I like this background technique.
 Stamped a large clock image with black Archival Ink. Roughed the edges of the ATC with a distressing tool, and colored these edges with the black Archival Ink.
 Used an embossing folder to create a checkerboard impression on black core card stock and used sandpaper to reveal the inner white in the raised areas.
 Stamped rabbit image with black Archival ink on watercolor paper, added some spun sugar Distress ink to the eye, nose and ears. Used foam adhesive to adhere rabbit to ATC. Used cranberry alcohol ink to color the inside of a type charm. Added 2 words cut out from a book page, colored edges with black Distress ink, topped with the enclosed epoxy sticker.

Sunday, February 24, 2013

Step 4 on Maggi's round 4 Sudoku background

Received Maggi's backgrounds (unfortunately this picture doesn't show the glimmer in the background), Jan added the ginko leaf image, and Mary made and added the Asian shrink plastic piece.
 I stamped an Asian background stamp to one corner.

Step 3 on Jan's round 4 Sudoku backgrounds

Received Jan's backgrounds in this 4th round of Sudoku ATC swaps. Jan used her Gelli plate to make the backgrounds, and Mary stamped on the raven. At first, I was distracted by all the differences in the fabulous backgrounds.
 The raven got my eye and seemed to cry out for a colorful eye, so I added a small yellow rhinestone. It will be fun to see what the other add to these ATCs.

Journal Page

This page is for Carol's quote/poem/writings journal in one of my stamp clubs. I stamped several quotes on background paper and added some images from the computer and several floral and butterfly embellishments.

Saturday, February 23, 2013

"X" ATC

"X" is the letter in the ABC of Techniques ATC swap on ArtVentures for March. This letter was giving me lots of difficulty, so I wanted to start early on it. Used the xylography image I made earlier and cut it on a slant. Layered the image over a sheet of background paper (that was a copy of old scientific experiment notes) and inked the edges with black India Ink. Made bubbles for the X-ray fish with "pearls" and an x letter bead. Wrote x unknown with a Dyno maker.
Some of the other swap members got a head start on this letter also, and I'm blown away with both their creative use of coming up with an "X" technique and the beauty of their ATCs. Check out June's and Rena's ATCs.

X is for Xylography

X is for Xylography. Wikipedia says: "xylography—is a relief printing artistic technique in printmaking in which an image is carved into the surface of a block of wood, with the printing parts remaining level with the surface while the non-printing parts are removed, typically with gouges. The areas to show 'white' are cut away with a knife or chisel, leaving the characters or image to show in 'black' at the original surface level. The block is cut along the grain of the wood (unlike wood engraving where the block is cut in the end-grain). The surface is covered with ink by rolling over the surface with an ink-covered roller (brayer), leaving ink upon the flat surface but not in the non-printing areas.
I decided to give this a try. As I'm not very good with sharp implements, I decided to try this with balsa wood and tools that make impressions. I "carved" or pressed an image of an xray fish into the wood. I want the fish to be white and the background black, so the fish image is in relief. I discovered I wouldn't need to make water lines, as the texture of the balsa creates thin lines.
 I used a brayer to spread black India ink over my wood block.
 Stamped the block on plain card stock:
and on white glossy card stock:
My drawing/carving/printing is very primitive looking. The xylographic prints that have been done over the edges are very intricate and beautiful.  Google xylography images and you can see lots of gorgeous art.

Thursday, February 21, 2013

Marie Antoinette Swap

I signed up for a Marie Antoinette Swap on Kindred Souls Art Group. We were given a 3-1/2" x 5" wood sample board as a base. Here's the front of my creation:
and the back:
I started with this background paper, stamped some french script with vintage photo Distress Ink, colored over the chandelier with silver and blue metallic gel pens, and added some yellow drop rhinestone brads. 
 Added more metal rimmed rhinestones and some plain rhinestones to the chandelier. Used a vintage Marie image and filled out the skirt using layers of lacy ribbons. Attached beads and lacy ribbons around the sides of the block.
 Made a large flower out of lacy ribbon and attached a large fleur de lis brad to the center front and a large metal rimmed "pearl" brad to the back. This was attached to the top of the beaded hanger, along with more iridescent beads.
 On the back, attached some textured paper with a "pearl" to the flower center, a smaller Marie image and the swap details.
Hope my partner likes it.

Wednesday, February 20, 2013

W is for Watercolor Stains

I saw this technique in the latest Technique Junkie Newsletter, I decided to give it a try.
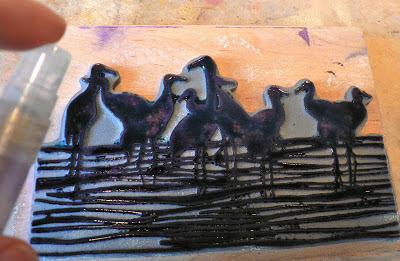
Use a bold stamp image and apply Distress Stain colors of your choice on the stamp surface.
 Spritz with Perfect Pearls mist (I mix my own with perfect pearls and water in a mini mister)
 Stamp on to watercolor paper and heat set.

This photo doesn't show the glimmer of the perfect pearls, but it is there.

Saw there was still lots of color on the stamp, so remitted with the Perfect Pearls Spray and stamped on a dictionary page several times:
 
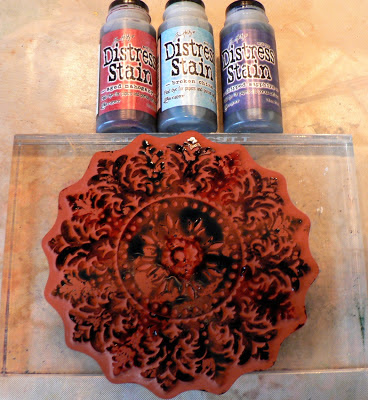
 Applied these colors of Distress Stains on another bold stamp, sprayed with Perfect Pearls mist,
 Stamped on watercolor paper and heat set:
 Resprayed the stamp with Perfect Pearls mist for another image on watercolor paper:
I may be using too much Distress Stain on the stamp, so thought I'd try the technique with Distress ink pads. First I inked the entire stamp with the yellow Distress ink, then added the other two colors to alternating flourishes (not sure what those parts are actually called), then spritzed with the Perfect Pearls Mist,
 and stamped on to watercolor paper and heat set:
Fun to experiment!

Tuesday, February 19, 2013

Favorite Background Stamp Swap

 On Next Generation Stampers Group, I've signed up for a swap where we use our favorite background stamp. I have lots of "favorite" background stamps, for this swap I choose a large flourish background.
Started by using a Twisted Alcohol background I made some time earlier.
 Sponged gold Lumiere paint on to my large flourish stamp and stamped it over the twisted alcohol background, and let dry.
For the card, added a vintage image with some gold Lumiere paint to highlight the hair and wings. Added a paper ribbon along with some mini yellow rhinestones and a saying.
Hope my swap partner likes it.

Doors ATC

The theme on the 9ATC group is "Doors and what lies behind them". I started with photos I had taken in Panama several years ago (each photo is of the same beach area, but taken at different times of day). Stamped a compass rose with black India Ink and let dry (it took several hours to dry). Wrote & colored part of the compass rose with a gold metallic Gelly Roll pen.
To make a door handle, took some used wrinkled and inked tissue paper, colored it with antiqued bronze and vintage photo Distress Stains. Cut out with a die and added a mini "gold" brad.
 Created a door, by cutting a square out of the upper part of textured paper. Inked with dark brown ink, then rubbed on some brown acrylic paint. Used some potato sacking and adhered it between two of these "door" pieces. Used the gold metallic Gelly Roll pen to add "fastener" dots to the left side. Added the "door handle" made above. Here is the front of the ATC:
When the "door" is opened, the altered photo is seen. (This side of the "door" is only inked, no acrylic paint applied on this side). Also stamped the word "voyage" with brown ink on a torn map (colored torn edges with brown Distress Ink". I let the brad fasteners from the front showing, to look like another door handle.

Monday, February 18, 2013

"W" Technique ATC

This month we are up to the letter "W" in the ABCs of Techniques ATCs on ArtVentures Group. For the background, I used the Wrinkled Wax Paper Resist with Embossing Folder made earlier. Added a vintage image of wandering waifs, and added some written wishes. Used black Archival ink pad to color the edges of the ATC.

W is for Wrinkled Wax paper Resist with Embossing Folder

W is for Wrinkled Wax paper Resist with Embossing Folder. I saw a technique using a Wax paper Resist with embossing folders on Youtube. I like the look of Wax Paper Resist using wrinkled wax paper, so decided to try this technique with Wrinkled Wax Paper.
Wrinkled wax paper, opened it up and lay it over a piece of glossy card stock inside an embossing folder. Then ran it through a Cuttlebug.
 Removed cardstock and wax paper from the embossing folder. Used a hot dry iron to press the wrinkled wax paper on the glossy card stock for about 20 - 30 seconds. Then remove the wax paper.
 Here you can see the waxed paper markings on the glossy card stock.
Used a blending tool to rub some blue Distress Inks over the card.
 Then I used the blending tool to add some green Distress Inks over the raised areas
Here is how it turned out:

Thursday, February 7, 2013

By the wishing well

someone's prince is waiting