 I got home from my trip ready to play and am having trouble. Besides my plastic not shrinking evenly, the ink started turning brown like it was burnt (I'm using alcohol inks). I saw Adrienne had a beautiful post on shrink plastic on her blog today, along with hints. My heat tool is a Milwaulke type gun, so maybe I'll try shrinking in the oven next. If you have any other tips for me. please leave me a note with this post. Thanks!!!
Friday, October 31, 2008
Shrink plastic disaster
I got home from my trip ready to play and am having trouble. Besides my plastic not shrinking evenly, the ink started turning brown like it was burnt (I'm using alcohol inks). I saw Adrienne had a beautiful post on shrink plastic on her blog today, along with hints. My heat tool is a Milwaulke type gun, so maybe I'll try shrinking in the oven next. If you have any other tips for me. please leave me a note with this post. Thanks!!!
Saturday, October 18, 2008
Raven's Nest Art Retreat - Sharing
 This evening we visited each other's rooms at the Washington Inn (wonderful historic hotel) and shared what we learned in our various classes. Margaret is in the middle. Fabulous time was had by all. There will be another Raven's Nest Art Retreat in Cedarburg Wisconsin next October.
Raven's Nest Art Retreat - Jill Berry's Class
 Today was Jill Berry's Class: 5 Books in one Day. Another fabulous instructor. We were able to learn 5 different techniques and get the basic book done, because Jill had all the papers pre cut for us and provided great instructions. She also provided us with lots of great bookmaking tips. These books will need to be decorated when I return home.
The first book we made was the Hard Spine Circle Accordion Book. I've added some of the charms I received here at the retreat. I will add color to the word ART! later.
 These are the inside pages (Jill hand painted these papers for us). I will add ATCs I collected here along with photos from the retreat and write some special memories.
 The second book was the ATC Blizzard Book. This is great to hold ATCs. She gave us instructions to make this any size we want.
 The third book was the Flutter with Pockets.
 The fourth book was the Carousel House Book. We had time to do some decorating with papers and images Jill provided. I decided to make a beach house. View showing the front and back pages:
 First open pages:
 Second open pages:
 Third (and last) open pages:
 I just need a couple of finishing touches on this book. Here Jill is encouraging my work in the Carousel House Book.
 The last book we did was the Flip Story Book. It is like a waterfall card in design. She also taught us how to make a slip cover that is just folded, no adhesives required. I need to think up something special for this story book.
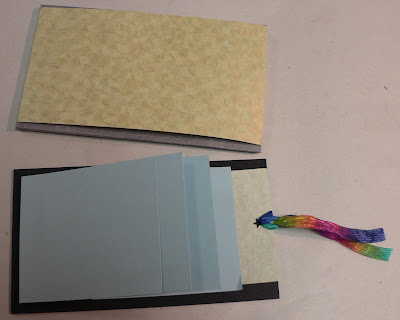
When I finish my books, I will post again.
Raven's Nest Art Retreat - Friends!
 From Left: Chrissy, Sweatpea, me, Maggi, Barbara. Enjoying a fabulous Wisconsin breakfast before going to our last class. Great to meet online friends and swapping partners!!! Oops, Margaret hasn't gotten up yet, need to catch her later.
Friday, October 17, 2008
Raven's Nest Art Retreat - Bernie Berlin's Class
 The second class I took today was Bernie Berlin's Resist This class. Bernie is a terrific teacher, very inspiring and helpful. This technique makes great backgrounds and can be found in Bernie's fabulous book "Artist Trading Card Workshop".
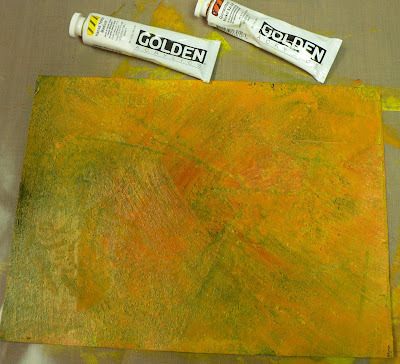
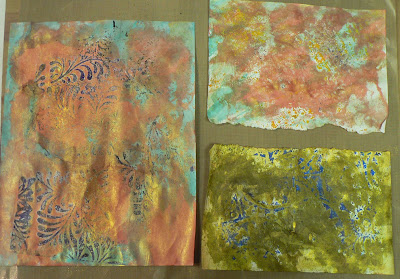
First, we painted four different colors onto watercolor paper (I used Ranger Daubers that Bernie brought along). When the paint was dry, we stamped on top with embossing ink and covered with clear embossing powder and heat set.
 Next, paint over the paper with heavy body acrylic paint, I used a deep purple.
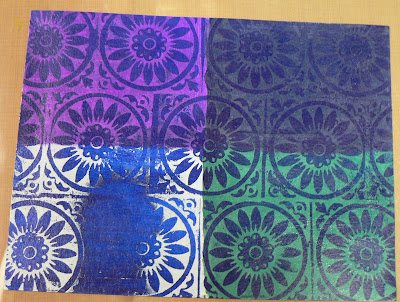
 Allow paint to dry, the lay down a sheet of white copy paper and run over it with a hot iron. The trick is to not leave the iron down for too long and to quickly peel up the copy paper. This removes the acrylic paint over the embossed images and also the embossing powder.
 Love how it looks. This will be great to cut up for backgrounds.
 I used four different colors of daubers, then stamped & embossed with clear powder (as described above) and painted over with blue acrylic paint.
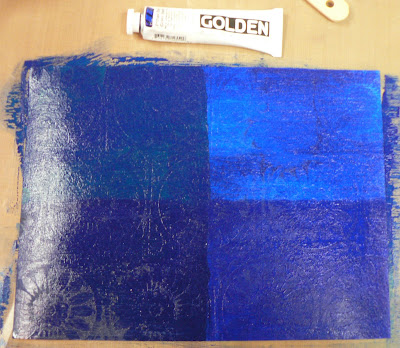
Here is what it looks like after ironing. I see I missed a spot of embossing, but it will be cut up into backgrounds. I may end up stamping over that area.
This sheet was covered with purple acrylic paint then stamped and embossed.
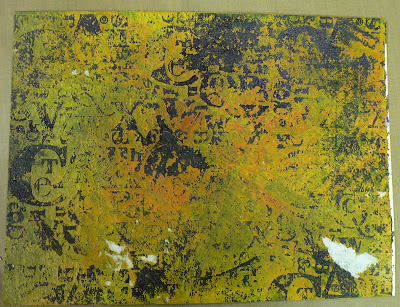
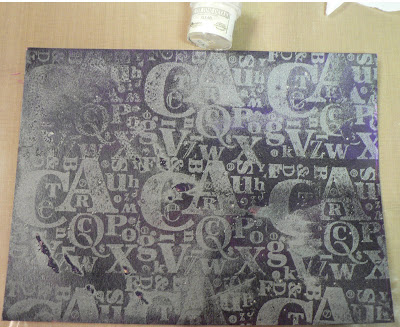 I painted over the embossed page with both the yellow and gold acrylic paints.
 What it looks like after ironing. Some of the copy paper stuck, but I'll be able to peel it off later. A great technique with lots of varying possibilities.
 Then Bernie showed us how to use the peeled off copy papers. We sprayed Radiant Mist sprays onto the craft sheet and smooshed the papers down to pick up that color.
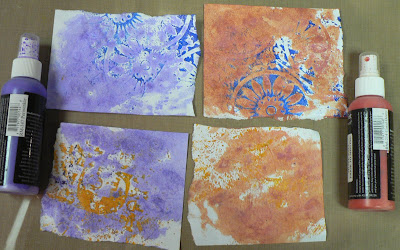 Then we painted on Twinkling H20s on top. These will make great backgrounds.
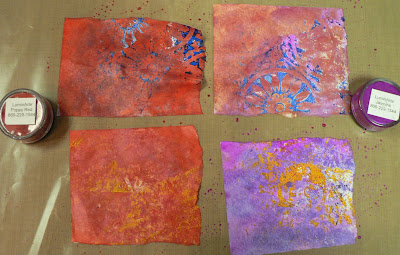 Here are some more of the peeled off papers I did tonight.
 I have lots more of the peeled off papers to play with when I get home.
Raven's Nest Art Retreat - Michael DeMeng's Class
 I'm having lots of fun at the Raven's Nest Art Retreat. My first class today was Transparency Collage-assemblage. Learned lots about texture, acrylic paints and other stuff (will need to go back and check out my notes). Michael deMeng is a great teacher and has a fun sense of humor. Here he's demonstrating a pooling technique with acrylic washes and "posing" for me.
I enjoyed applying texture and experimenting with acrylic washes. I didn't get to the assemblage part, but love my box and what I've learned.
 Close up of my box.
 Michael saying something encouraging about my box during the class review time.

Maggi's Chunky page

This is for a special Birthday Chunky Book for Maggi. She likes Oriental, so for the front of the page, I ran black glossy card stock through a Cuttlebug embossing folder and then dabbed a galaxy gold Brilliance pad over the surface. I finished it by adding an Oriental Row House and ran a gold leafing pen over the edges.
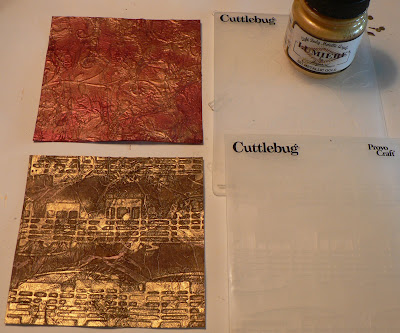
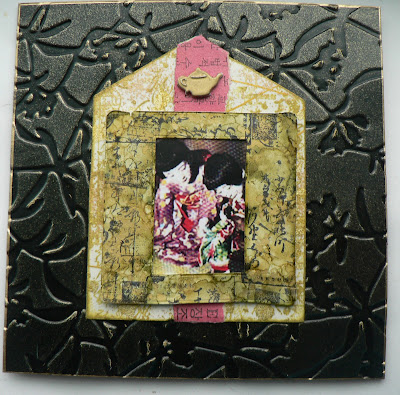 I choose two of the faux leather tissue papers I had made and ran each of them through a different Cuttlebug embossing folder and then ran some Lumiere paint over the surface with my finger.
 I cut out two butterflies with my Cuttlebug using paper that had been on the bottom of my spray box. I used the matching embossing folders to make two different designs and colored them with a black Archival ink pad. Then I glued them back to back.
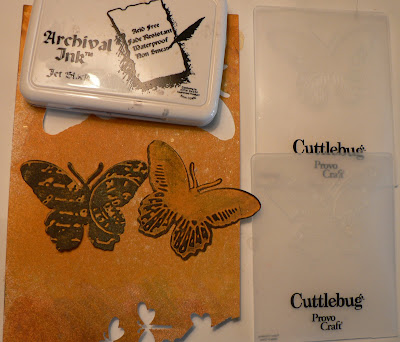 I cut the two backgrounds on the diagonal and glued them to the back of the page. I glued the butterfly just along the body and antennae to the paper. Stamped out words on the same yellow/gold paper as the butterfly and attached them to the page.
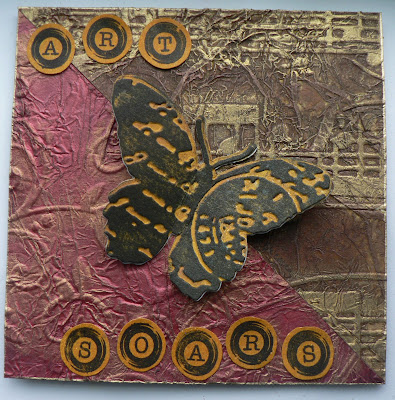
Happy Birthday Maggi!!!!
Chrissy's chunky page

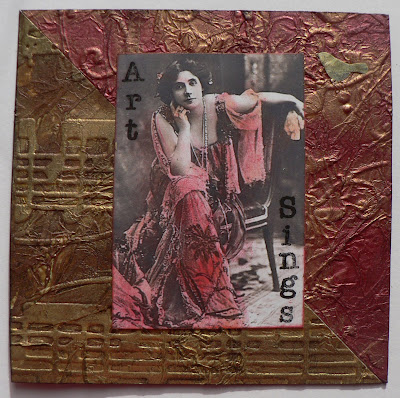
This is a page for Chrissy's Birthday Chunky Book. For the front, I used the other halves of the papers I used on Maggi's page. I colored an image with red gold Brilliance ink and also used it to put color on the edges. I stamped some words with black Archival ink, and used that to color the edges of the page.
 For the back, I was having fun with Tim Holt'z March Technique Challenge. I stamped an image with gesso on to a manila folder cut to 4" x 4".
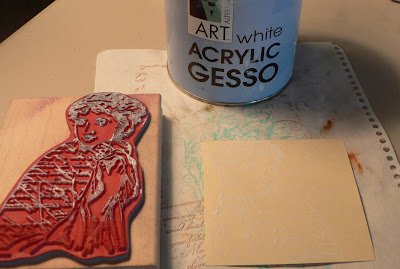 Made 3 different sprays with Adirondak inks & perfect pearls to spray over the image.
 For the back, I was having fun with Tim Holt'z March Technique Challenge. I stamped an image with gesso on to a manila folder cut to 4" x 4".
Made 3 different sprays with Adirondak inks & perfect pearls to spray over the image.
For the back, I was having fun with Tim Holt'z March Technique Challenge. I stamped an image with gesso on to a manila folder cut to 4" x 4".
Made 3 different sprays with Adirondak inks & perfect pearls to spray over the image.
 I wanted to lighten the color around the face, so I sprayed that area with water and let it dry.
 To give the image a dimensional look, I stamped the same image with black Archival ink and slightly offset it. I also stamped a flourish and a saying. Added a small heart shaped mirror, that I ran a gold leafing pen along the edges. Finished by coloring the edges with black ink.
 Happy Birthday Chrissie!!!
Tuesday, October 14, 2008
Overstamped Resist Technique
On NGS we are going to do a book study together. Our group choose Nancy Curry's book "Texture Effects for Rubber Stamping". I have this beautiful book and have used some of the fabulous techniques in this book. I need to make Birthday cards and decided to do variations of the first technique based on her "Dragonfly Song" card.
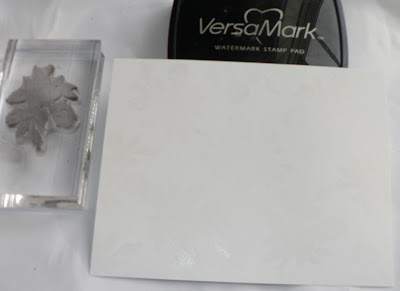
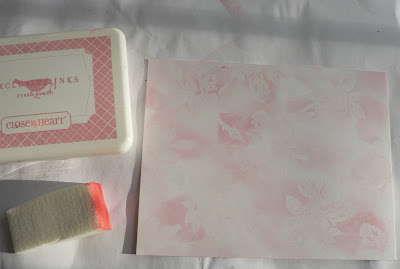
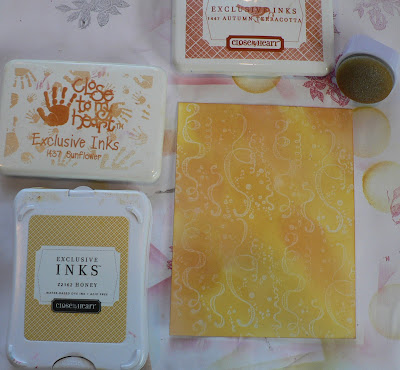
The first step is to stamp an image with a clear resist ink on glossy or coated card stock. If you don't have a clear resist ink pad, try the Vaseline technique. I think it would work and Manna has a video tutorial on her blog. With VersaMark or other clear resist ink, you need to heat set with your heat tool before adding ink.
 Using dye ink, start with your lightest ink color and sponge on.
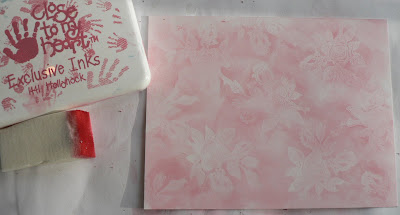
 Then sponge on your next darker in ink color.
 Then sponge on your darkest color. Play around to decide where you want the color to be lighter and darker. Sponge on enough ink so your "resist" images show through. I like to use the same color, here pink, in different intensities, but you can use complementary or other colors.
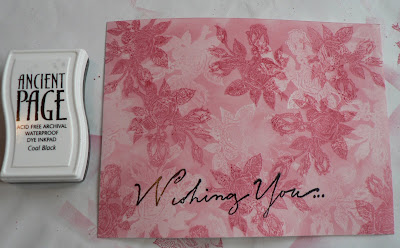
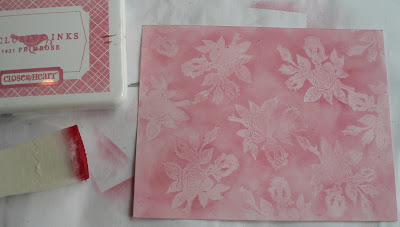 Overstamp the image in a dark dye ink. I like using the same color as the darkest ink I already sponged on. Nancy recommends playing around with different placements in overstamping.
 Add a saying with black permanent ink for high contrast.
 I mounted my background onto gray card stock, added a black ribbon and a large flower with a large black brad in the center. The middle flower was white, I added color by running a black marker over the ridges.
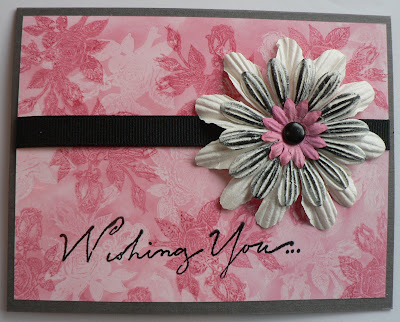 I like cards with thick embellishments. But I need some flat cards for mailing. I like this resist technique of Nancy's, because it gives an appearance of depth even though it is flat.
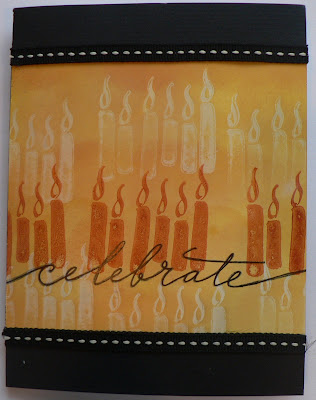
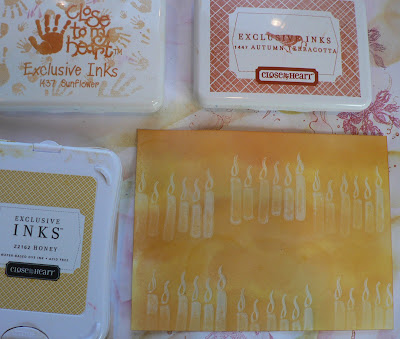 Stamped a row of candles in the darkest of the yellow inks. Stamped "celebrate" in permanent black ink. Mounted on black card stock and added black ribbons.
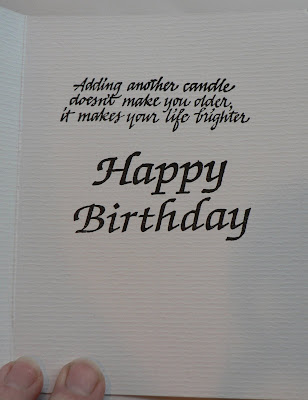
 Here is a saying I like to use with lots of candles.
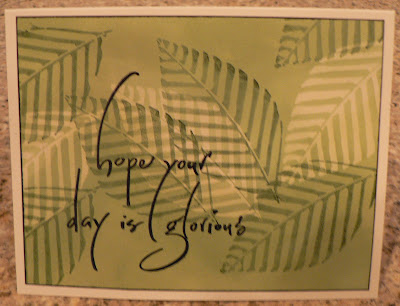
 The next card was done with green inks. Overstamped the leaves with the darkest of the green inks. Edged the background with black permanent ink along with adding a saying. Mounted on white card stock.
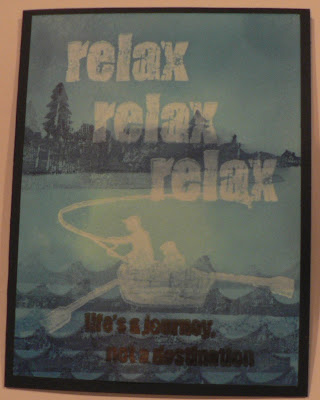
 The last card is a different variation. The overstamping is done with different stamps, not using the same stamps that were used with the VersaFine ink.
 This technique would make great backgrounds to be used in ATCs and other projects, not just for card making.
The first step is to stamp an image with a clear resist ink on glossy or coated card stock. If you don't have a clear resist ink pad, try the Vaseline technique. I think it would work and Manna has a video tutorial on her blog. With VersaMark or other clear resist ink, you need to heat set with your heat tool before adding ink.
 Using dye ink, start with your lightest ink color and sponge on.
 Then sponge on your next darker in ink color.
 Then sponge on your darkest color. Play around to decide where you want the color to be lighter and darker. Sponge on enough ink so your "resist" images show through. I like to use the same color, here pink, in different intensities, but you can use complementary or other colors.
 Overstamp the image in a dark dye ink. I like using the same color as the darkest ink I already sponged on. Nancy recommends playing around with different placements in overstamping.
 Add a saying with black permanent ink for high contrast.
 I mounted my background onto gray card stock, added a black ribbon and a large flower with a large black brad in the center. The middle flower was white, I added color by running a black marker over the ridges.
 I like cards with thick embellishments. But I need some flat cards for mailing. I like this resist technique of Nancy's, because it gives an appearance of depth even though it is flat.
The next card, I did with a variety of yellow inks.
 I overstamped the confetti with the darkest of the yellow ink. Then stamped an image with permanent black ink and mounted on black card stock. Punched out some stars out of the extra background and along the bottom edge of the piece I used.
 I used the same yellows for the next card.
 I overstamped the confetti with the darkest of the yellow ink. Then stamped an image with permanent black ink and mounted on black card stock. Punched out some stars out of the extra background and along the bottom edge of the piece I used.
 I used the same yellows for the next card.
 Stamped a row of candles in the darkest of the yellow inks. Stamped "celebrate" in permanent black ink. Mounted on black card stock and added black ribbons.
 Here is a saying I like to use with lots of candles.
 The next card was done with green inks. Overstamped the leaves with the darkest of the green inks. Edged the background with black permanent ink along with adding a saying. Mounted on white card stock.
 The last card is a different variation. The overstamping is done with different stamps, not using the same stamps that were used with the VersaFine ink.
 This technique would make great backgrounds to be used in ATCs and other projects, not just for card making.